Create a luxury-look jewelry piece in under an hour with this simple “S-Wave” beading technique.
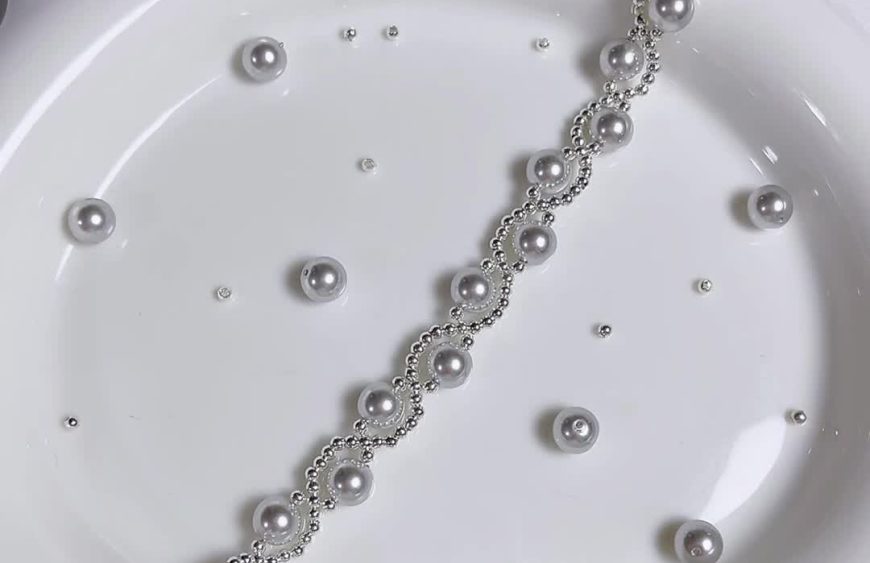
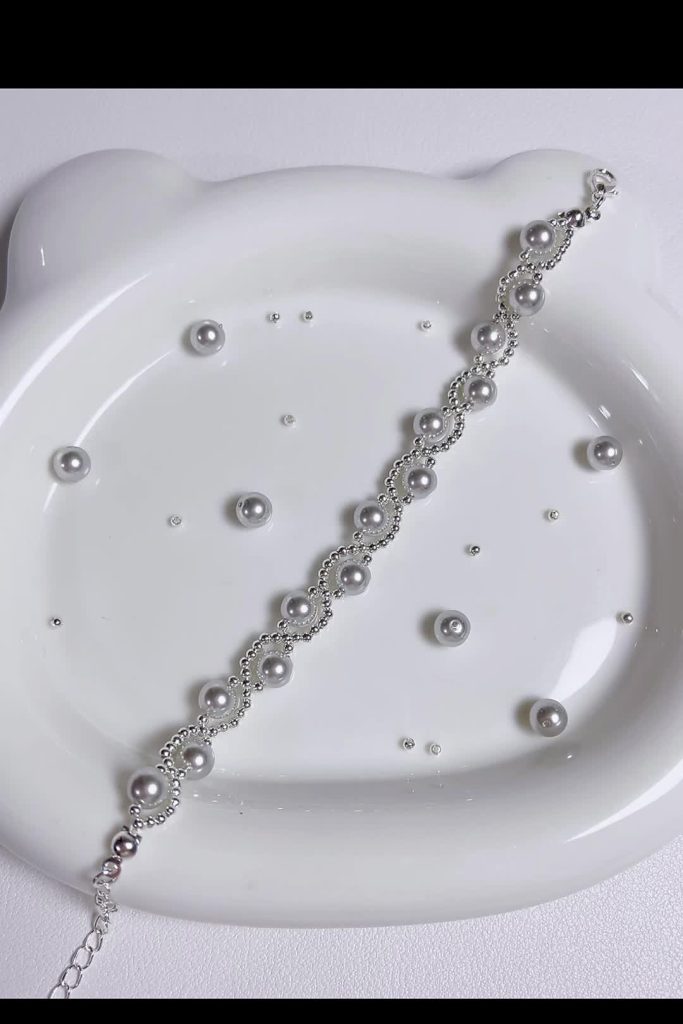
Are you looking for a jewelry project that looks expensive but is surprisingly easy to make? This Grey Pearl Wave Bracelet uses a clever alternating pattern to create a stunning “S” curve design that sits beautifully on the wrist. Whether you are making a gift for a loved one or a treat for yourself, this beaded bracelet tutorial breaks down the process into bite-sized steps.
Why You’ll Love This Project:
- High-End Aesthetic: The combination of grey pearls and silver spacers creates a modern, sophisticated look.
- Beginner Friendly: No complex weaving; just a simple “cross-pass” technique.
- Fast Completion: You can finish this in about 30–45 minutes.
🧵 Materials & Tools List
To achieve the crisp, professional finish seen in the video, specific bead sizes are recommended. Here is what you will need:
- Beads A (Focal): 6mm or 8mm Round Faux Pearls (Grey or White).
- Beads B (Detail): 2mm or 11/0 Metal Seed Beads (Silver).
- Beads C (Connectors): 3mm Smooth Round Spacer Beads (Silver).
- Thread: Clear Nylon Fishing Line or Beading Thread (0.2mm – 0.25mm recommended for stiffness). Do not use elastic for this specific design if you want the wave shape to hold.
- Findings: 1 Lobster Clasp and 1 Closed Jump Ring (or split ring).
- Tools: Scissors and optional jewelry glue for the final knot.
📝 Step-by-Step Instructions
Follow these instructions closely. We use specific timestamps so you can follow along with the video reference.
Phase 1: Setting the Foundation
Step 1: Attach the Clasp
[00:06]
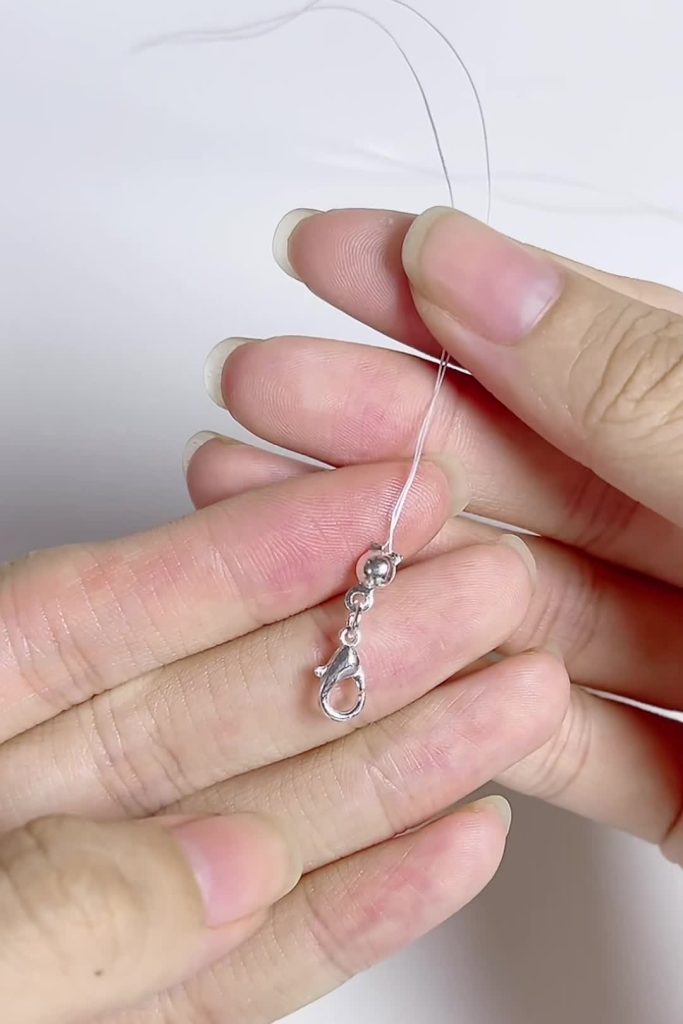
Cut a comfortable length of fishing line (approx. 30 inches). Slide your lobster clasp to the very center of the thread so you have two equal lengths of line working side-by-side.
Step 2: The Anchor Bead
[00:09]
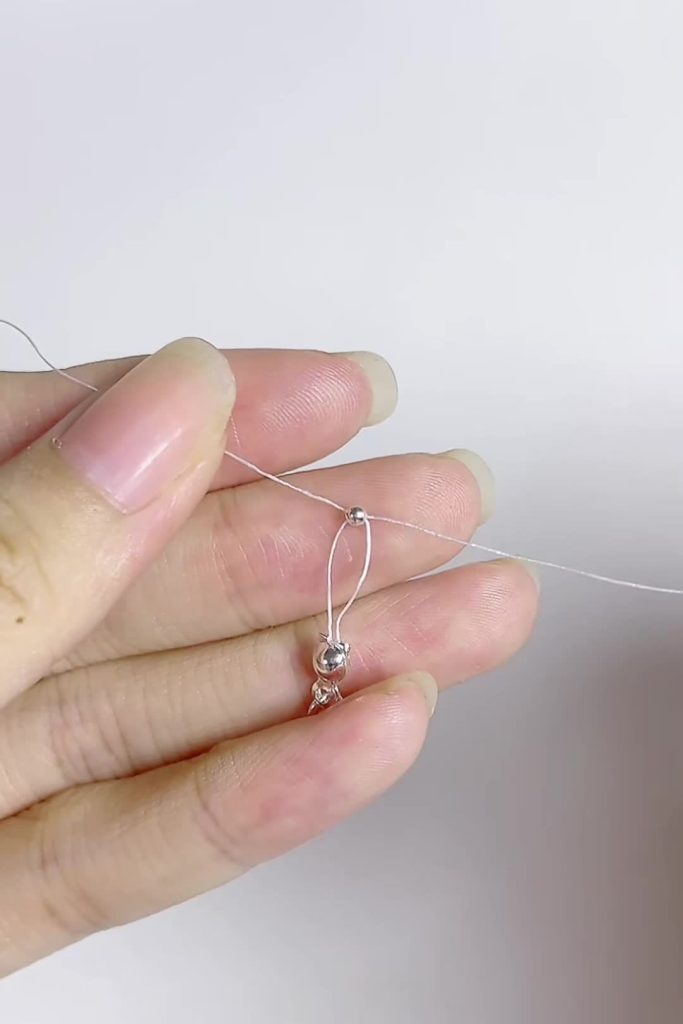
Take one 3mm Spacer Bead (Bead C). Thread the left line through the bead, and then take the right line and pass it through the same bead in the opposite direction (criss-cross). Pull tight. This secures the clasp and starts your pattern.
Phase 2: Creating the “S” Wave Pattern
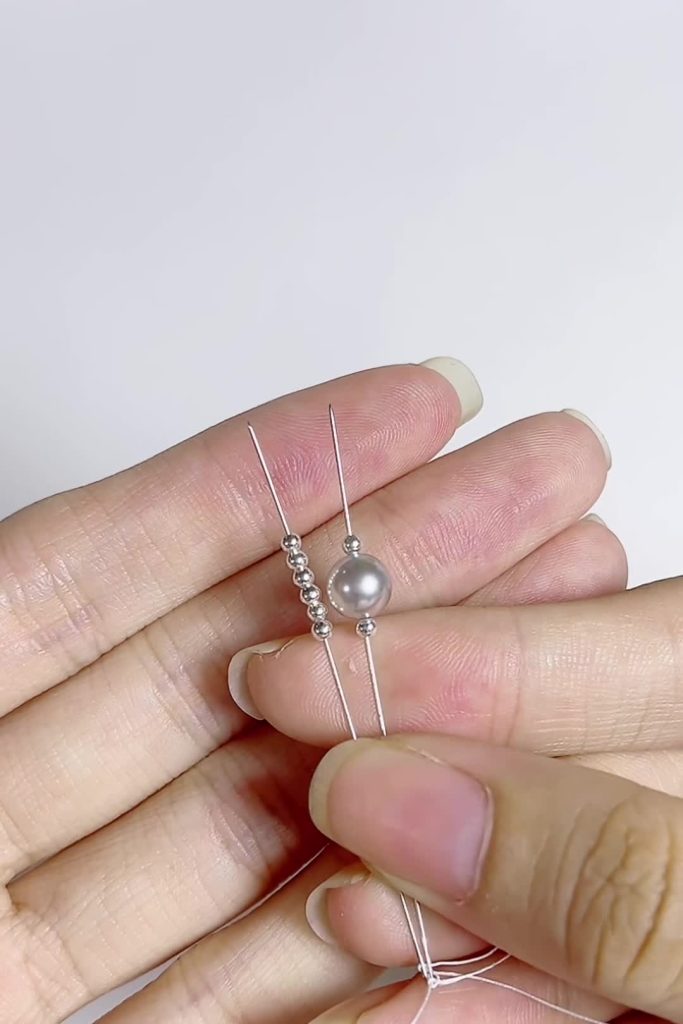
Step 3: The First Curve (Left Emphasis)
[00:11]
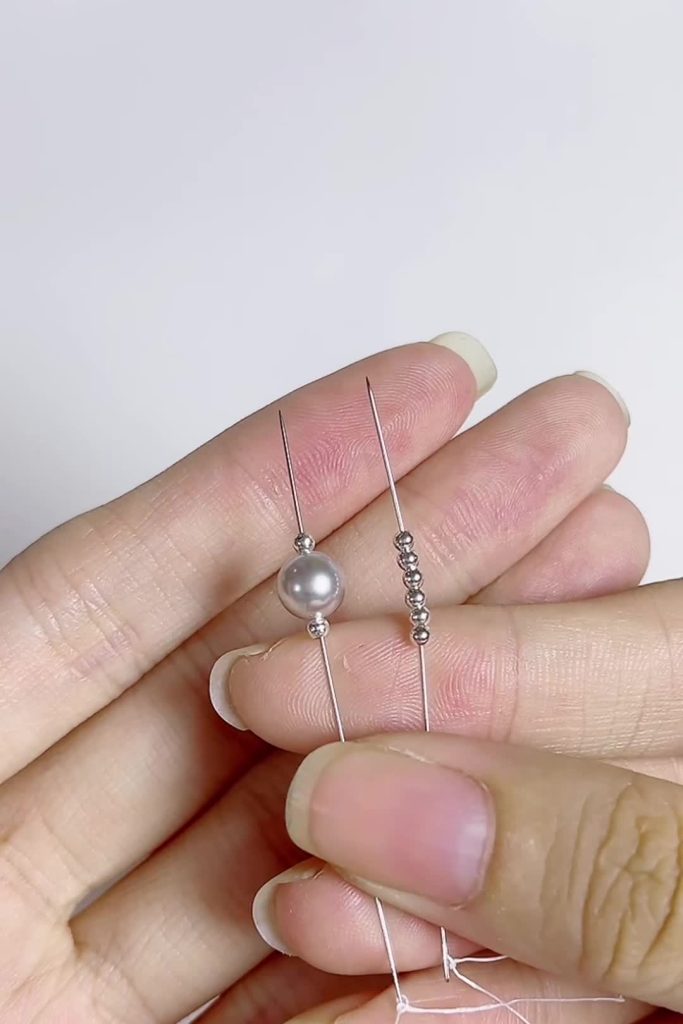
Separate your threads.
- On the Left Thread, slide on 1 Large Pearl.
- On the Right Thread, slide on 5 Small Seed Beads.
Step 4: Locking the First Unit
[00:14]
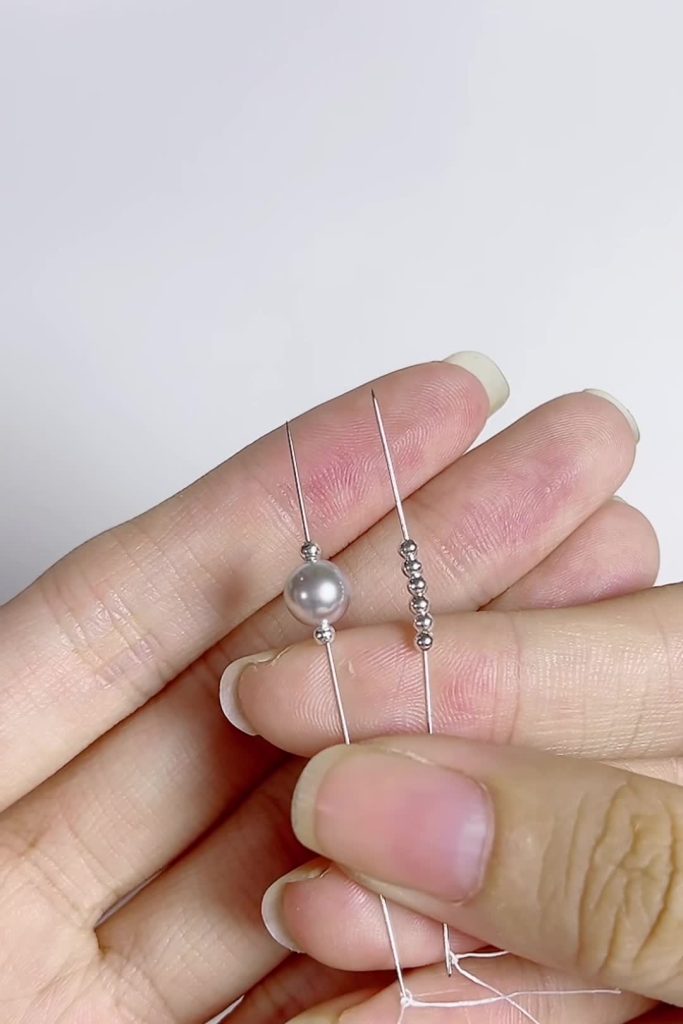
Pick up 1 Spacer Bead. Cross both threads through this bead (pass the left thread through, then pass the right thread back through it in the opposite direction). Pull both threads tight. You will see the seed beads curve around the pearl.
Step 5: The Second Curve (Right Emphasis)
[00:17]
Now, we alternate the pattern to create the wave.
- On the Left Thread, slide on 5 Small Seed Beads.
- On the Right Thread, slide on 1 Large Pearl.
- Note: This is the exact opposite of Step 3.
Step 6: Locking the Second Unit
[00:20]
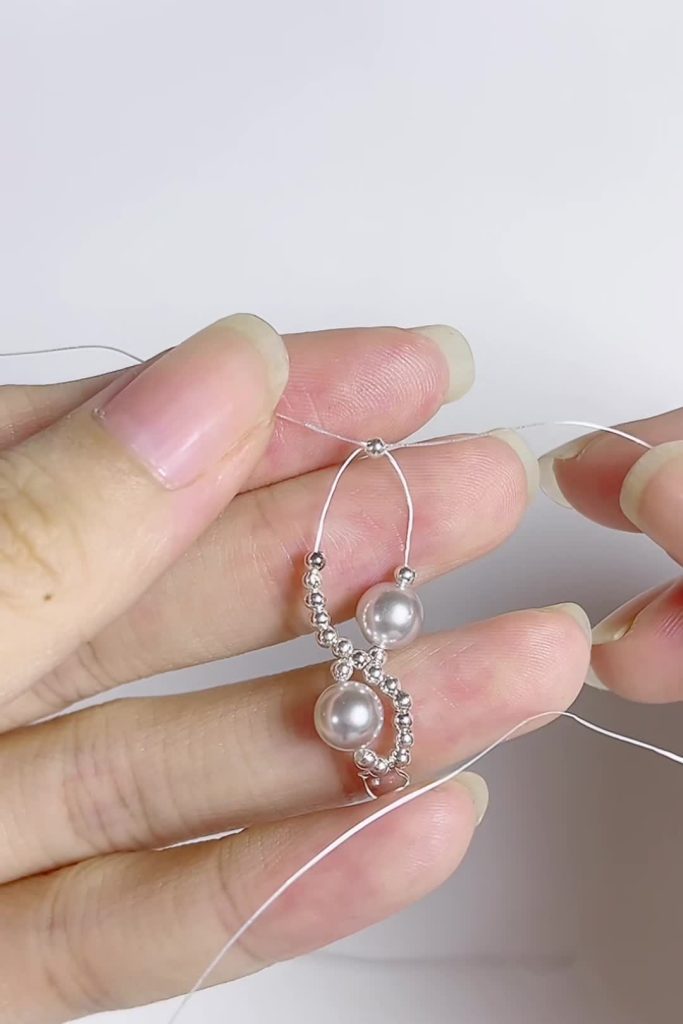
Pick up 1 Spacer Bead. Cross both threads through this bead just like before. Pull tight. You should now see an “S” shape forming.
Phase 3: Repetition & Finishing
Step 7: Continue the Pattern
[00:23]
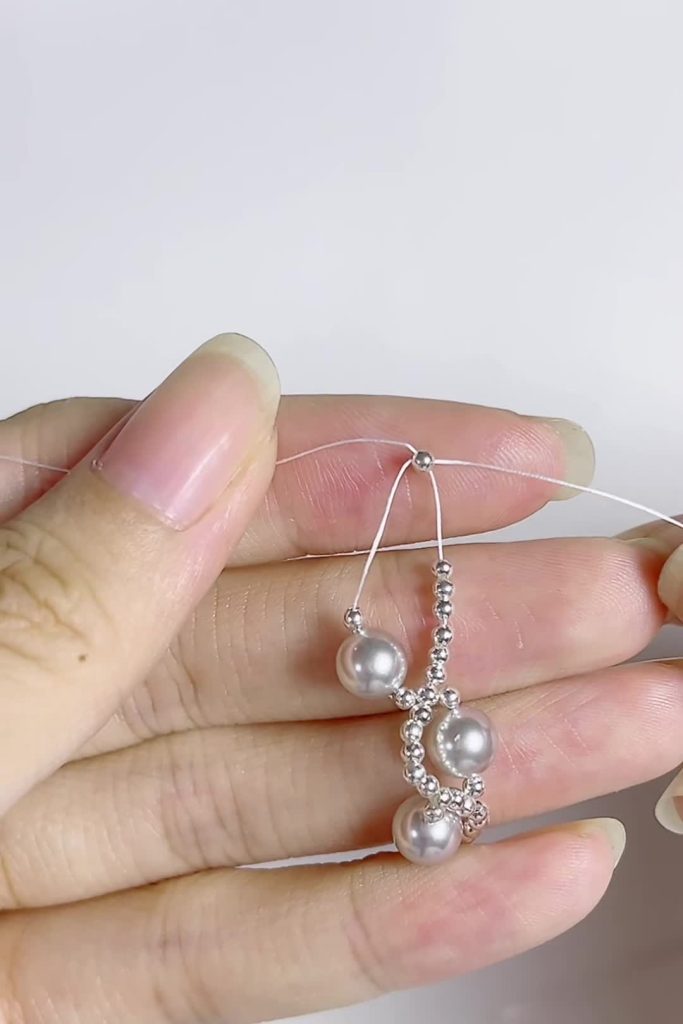
Repeat Steps 3 through 6. Always remember to switch which side gets the pearl and which side gets the seed beads after every cross-bead.
- Sequence: Left Pearl/Right Seeds → Cross → Left Seeds/Right Pearl → Cross.
Step 8: Finalizing Length
[00:25]
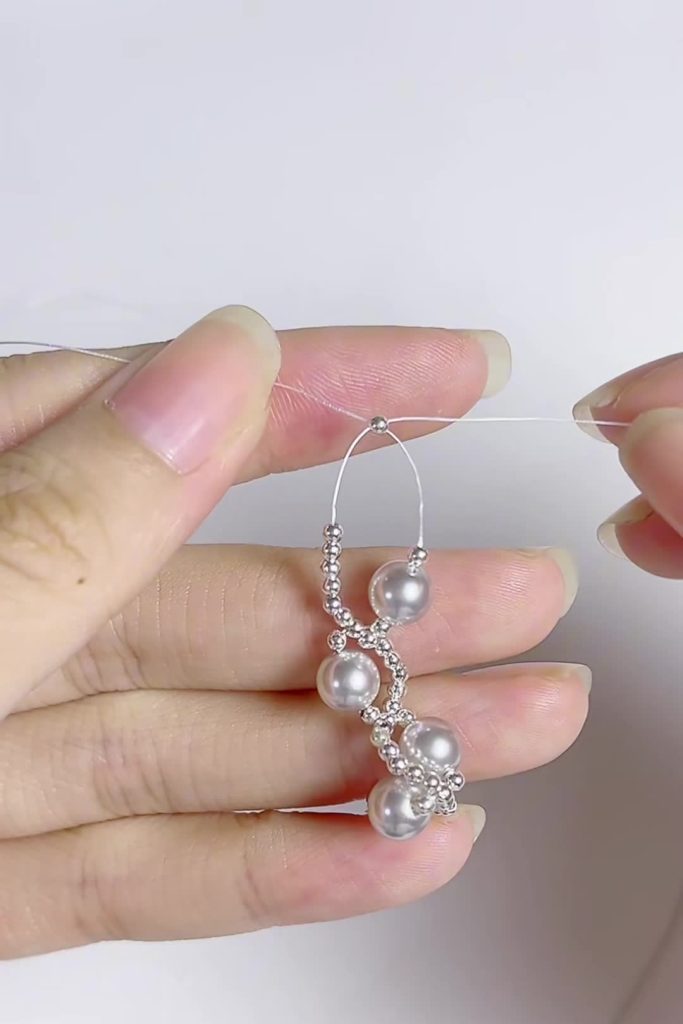
Continue this process until the bracelet wraps comfortably around your wrist (usually 6 to 7 inches). Ensure your last step ends with a “Cross” through a spacer bead. Tie a secure surgeon’s knot using the remaining thread onto a jump ring or extension chain, apply a dot of glue, and trim the excess wire.
🔧 Troubleshooting & Pro-Tips
- The “Wave” looks flat: This usually happens if your tension is too loose. Because we are using non-elastic fishing line, you must pull the threads tight after every “cross” step (Steps 4 and 6) to force the seed beads to curve snugly around the pearl.
- My bracelet is twisting: Ensure you are accurately alternating sides. If you put the pearl on the Left side two times in a row, you will create a spiral or circle instead of a wave.
- Thread Choice: Do not use soft sewing thread. You need the stiffness of fishing line or Fireline to support the structure of the wave.
🎨 Variations & Styling Ideas
- Bridal Look: Use white pearls and gold seed beads for a classic wedding accessory.
- Boho Chic: Use turquoise stone beads instead of pearls and bronze seed beads.
- Gradient Effect: Change the color of the pearls every 3 units for an ombre effect (e.g., White → Light Grey → Dark Grey).
❓ Frequently Asked Questions (FAQ)
Q: Can I use elastic string for this bracelet?
A: It is not recommended. Elastic string is soft and stretchy, which may cause the “wave” of seed beads to collapse or sit unevenly. Clear nylon fishing line provides the necessary structure to keep the curve shape distinct.
Q: What size pearls work best?
A: The video demonstrates what appears to be 6mm pearls. If you use 8mm pearls, you may need to increase the number of seed beads on the opposite side (from 5 beads to 6 or 7) to ensure they span the length of the larger pearl.
Q: How do I finish the bracelet without a crimp bead?
A: If you are using fishing line, you can use a “back-pass” method where you weave the remaining thread back through the last few beads of your work, tie several overhand knots between beads, add a drop of glue, and hide the knot inside a pearl.
Q: How many beads do I need for a standard wrist?
A: For a standard 7-inch wrist, you will typically need about 18-20 pearls and approximately 100 seed beads.