Difficulty: Beginner | Time: 30 Minutes | Cost: Low
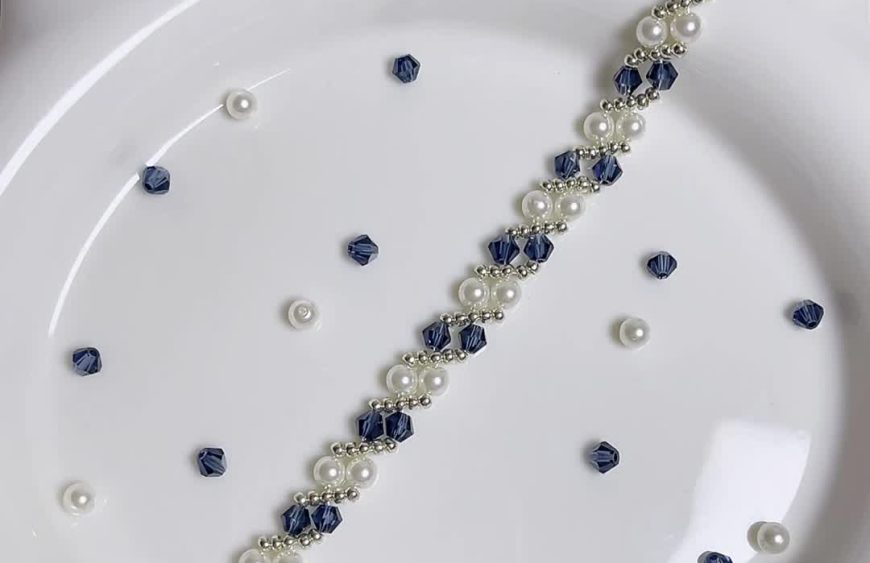
Are you looking to add a touch of elegance to your jewelry collection without breaking the bank? This DIY Crystal & Pearl Bracelet looks incredibly expensive but is surprisingly easy to make. By alternating shimmering bicone crystals with classic pearls, you create a timeless design perfect for weddings, gifts, or everyday glam.
In this step-by-step beaded bracelet tutorial, we will guide you through a simple cross-weaving technique that even complete beginners can master. Let’s get beading!
Materials & Tools
To achieve the professional finish seen in the video, precision is key. Here is exactly what you need:
- Thread: Clear Nylon Fishing Line or “Tiger Tail” Beading Wire (approx. 0.2mm – 0.3mm thickness).
- Beads A (Crystals): 4mm Bicone Crystals (Dark Blue or color of choice). Swarovski or Preciosa crystals recommended for maximum sparkle.
- Beads B (Pearls): 4mm or 5mm Round Faux Pearls (White/Cream).
- Beads C (Spacers): 2mm or Size 11/0 Seed Beads (Silver or Clear).
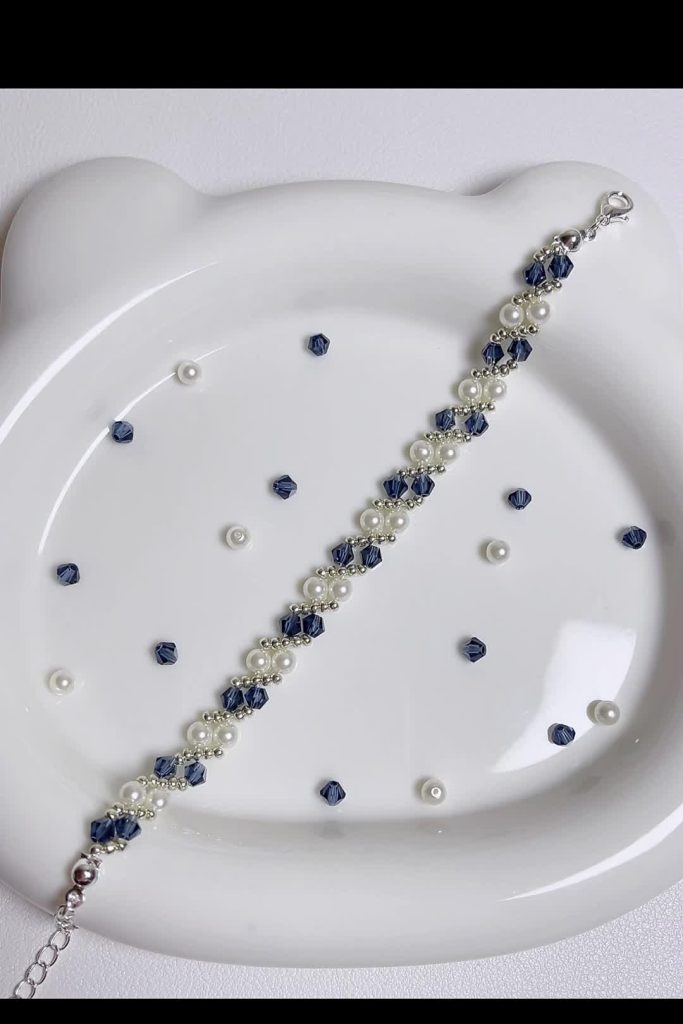
- Findings: 1 Lobster Clasp and 1 Extension Chain (Silver tone).
- Tools: Scissors and optional flat-nose pliers for securing knots.
Step-by-Step Instructions
Follow this exact pattern to recreate the design.
Phase 1: Starting the Base
[00:04] Attach the Clasp
Cut a comfortable length of fishing line (approx. 30 inches). Thread your lobster clasp to the very center of the line. You should now have two equal lengths of working thread (Left and Right).
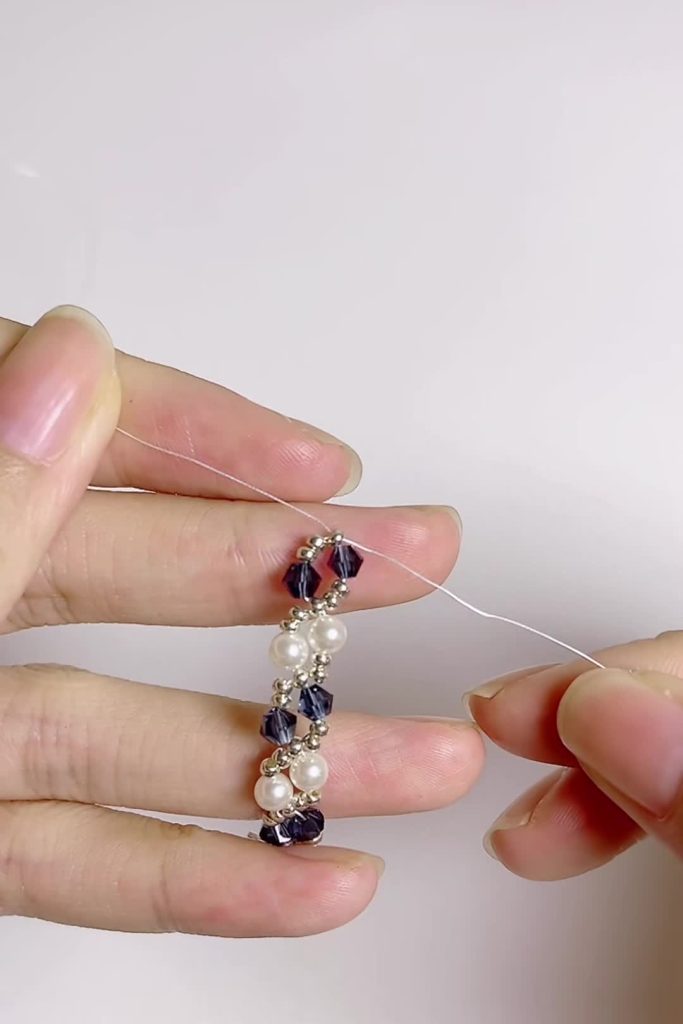
[00:07] The First Cross
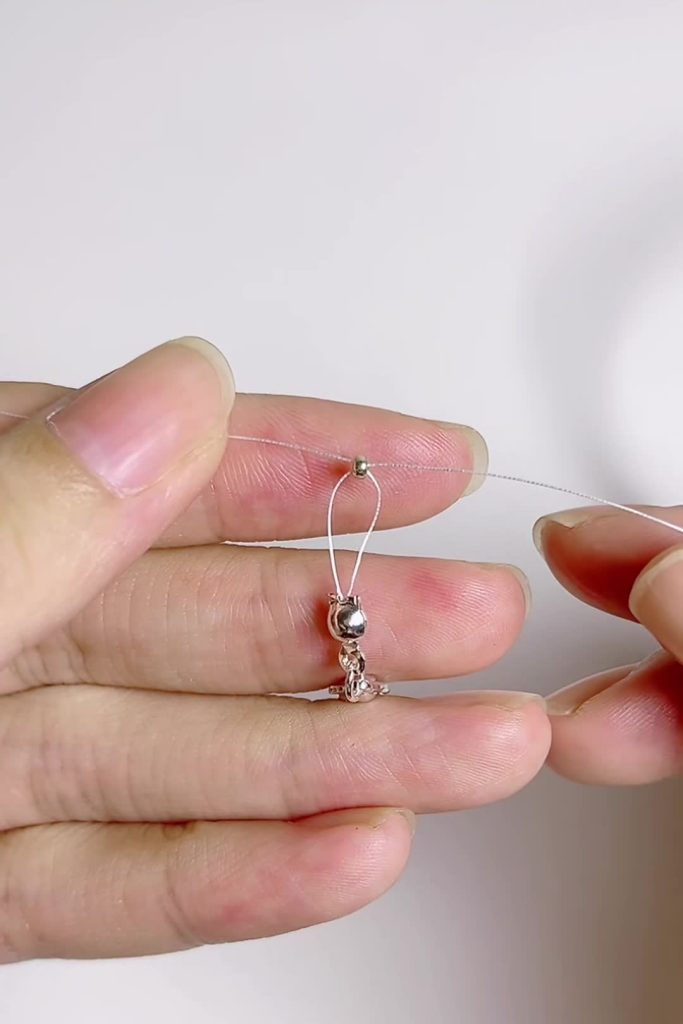
Take one Seed Bead. Thread the Left wire through one side and the Right wire through the opposite side (criss-cross fashion). Pull tight so the bead sits directly beneath the lobster clasp. This locks the clasp in place.
Phase 2: The Crystal Sequence
[00:09] Threading the Crystals
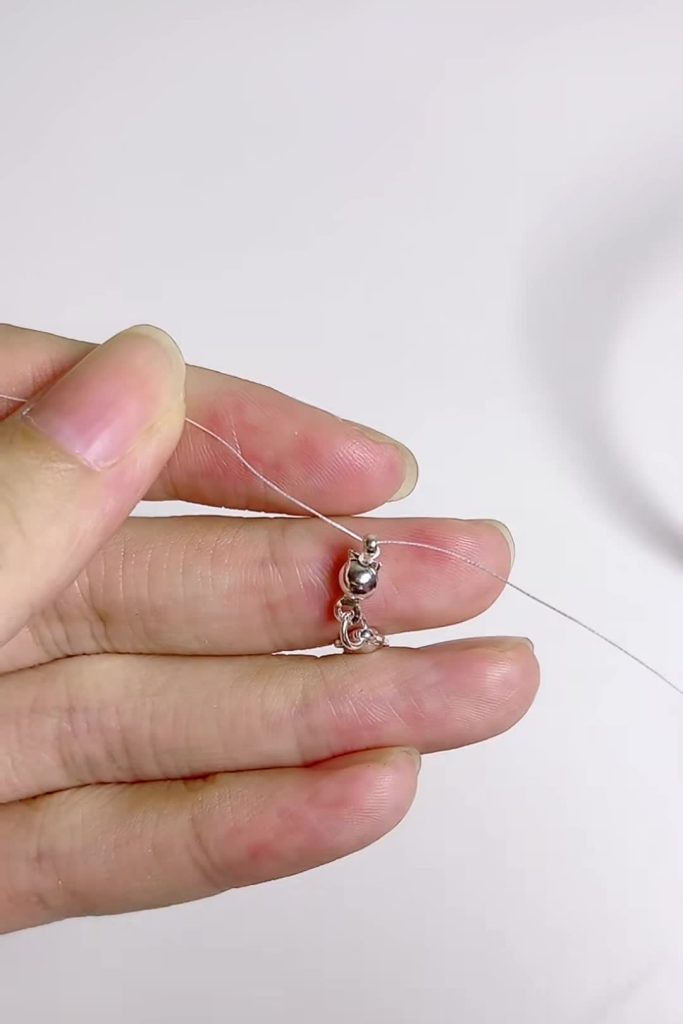
On the Left Thread, string 1 Seed Bead followed by 1 Bicone Crystal.
On the Right Thread, string 1 Seed Bead followed by 1 Bicone Crystal.
Note: Ensure the seed beads are closest to the center, touching the previous bead.
[00:11] Closing the Crystal Unit

Pick up a new single Seed Bead. Thread the Left wire through one side and the Right wire through the other to cross them. Pull both threads outward evenly. You have just formed your first diamond shape!
Phase 3: The Pearl Sequence
[00:14] Threading the Pearls

On the Left Thread, string 1 Seed Bead followed by 1 Round Pearl.
On the Right Thread, string 1 Seed Bead followed by 1 Round Pearl.
[00:17] Closing the Pearl Unit
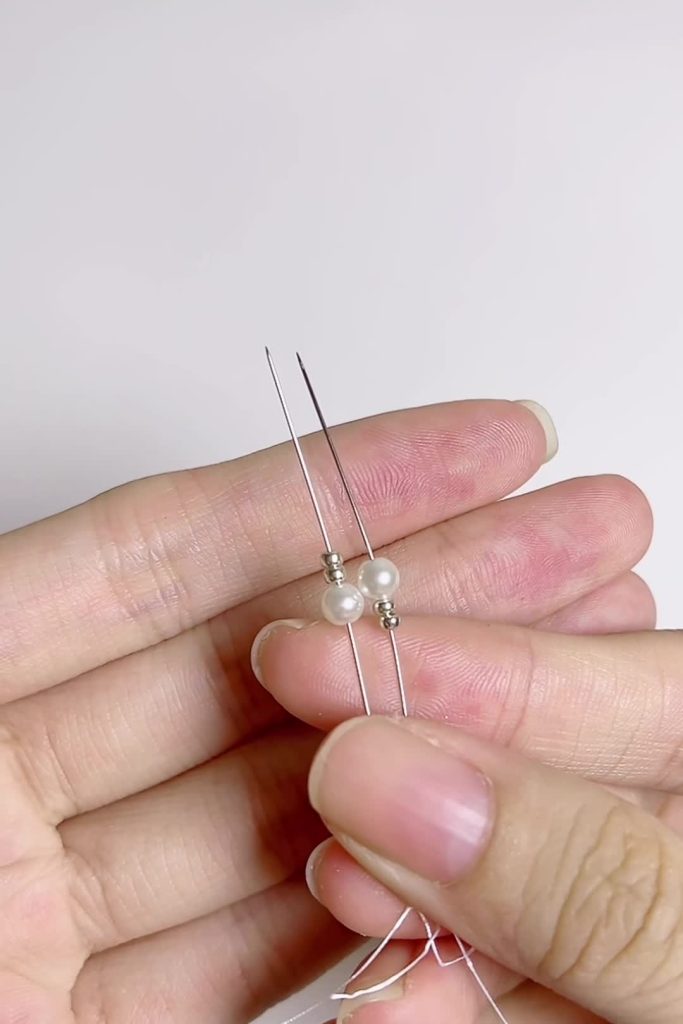
Pick up a new single Seed Bead. Just like before, cross both threads through this bead in opposite directions. Pull tight. You now have a softer, rounder shape contrasting the sharp crystals.
Phase 4: Repetition & Finishing
[00:20] Repeat the Pattern
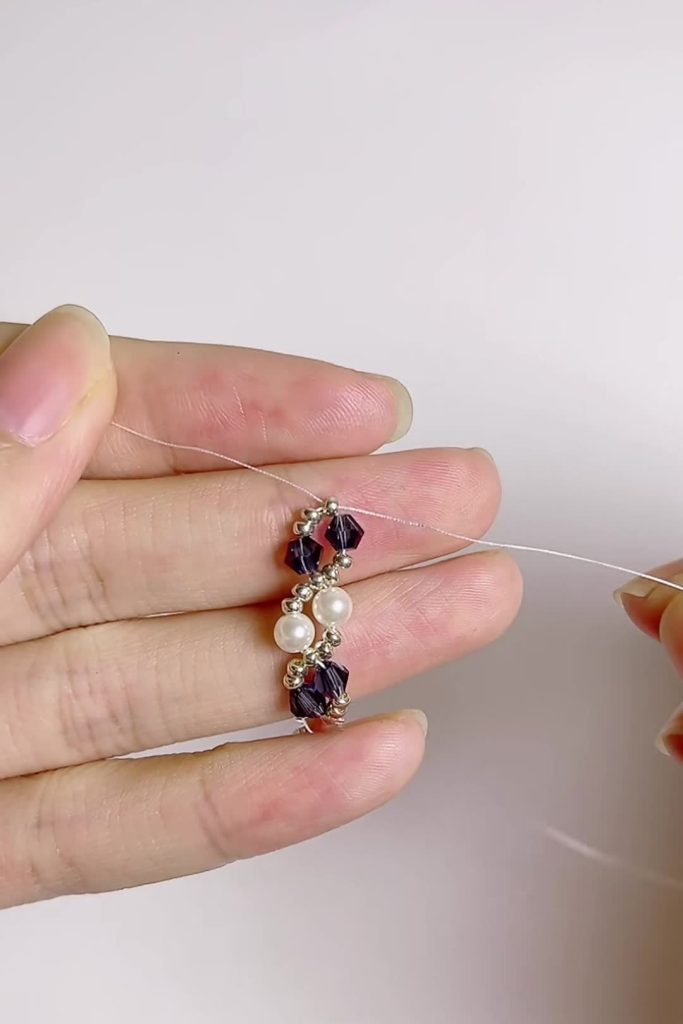
Continue alternating between the Crystal Sequence (Phase 2) and the Pearl Sequence (Phase 3).
- Pattern: Crystal Unit -> Pearl Unit -> Crystal Unit -> Pearl Unit.
[00:24] Measure and Tie Off
Continue until the bracelet fits your wrist (standard length is usually 6.5 to 7 inches).
- To Finish: On the final cross, instead of adding a new bead, loop both threads through the ring of your extension chain.
- Retrace your thread back through the last few beads to reinforce the strength.
- Tie a secure surgeon’s knot, add a dab of jewelry glue, and trim the excess wire.
Troubleshooting & Pro-Tips
- The “Buckle” Effect: If your bracelet looks stiff or crooked, you are pulling the thread too tight. The tension should be firm but allow the beads to sit flat.
- Thread Choice: Do not use elastic string for this design. It is too heavy for elastic and will droop. Nylon fishing line or fireline provides the best structure.
- Knot Security: Nylon line can be slippery. When tying off at the end, use a lighter to slightly melt the very tip of the thread (be careful not to burn the beads!) to prevent the knot from slipping.
Variations to Try
- Monochrome Magic: Use clear crystals and silver pearls for a “bridal” look.
- Boho Chic: Replace the pearls with turquoise stone beads and the crystals with gold spacers.
- The Choker: Keep beading until the piece is 14 inches long to create a stunning matching necklace.
Frequently Asked Questions (FAQ)
Q: Can I use glass beads instead of crystals?
A: Absolutely! While bicone crystals catch the light best, faceted glass beads are a budget-friendly alternative that still offers great shine.
Q: What is the best needle size for seed beads?
A: If you are using size 11/0 seed beads, a size 10 or 12 beading needle is recommended. However, with the stiff fishing line used in this video, you often don’t need a needle at all.
Q: How do I stop the fishing line from curling?
A: If your line is curly off the spool, run it through a folded piece of warm fabric or use a hair dryer on low heat (from a distance) to relax the nylon memory before you start.
Q: My bracelet broke! How do I fix it?
A: Unfortunately, cross-woven bracelets are hard to “patch.” It is usually safer and neater to cut the beads loose and re-thread them on a new line.
Did you try this tutorial? Tag us in your photos! If you found this guide helpful, share it on Pinterest and subscribe for more easy DIY jewelry hacks.