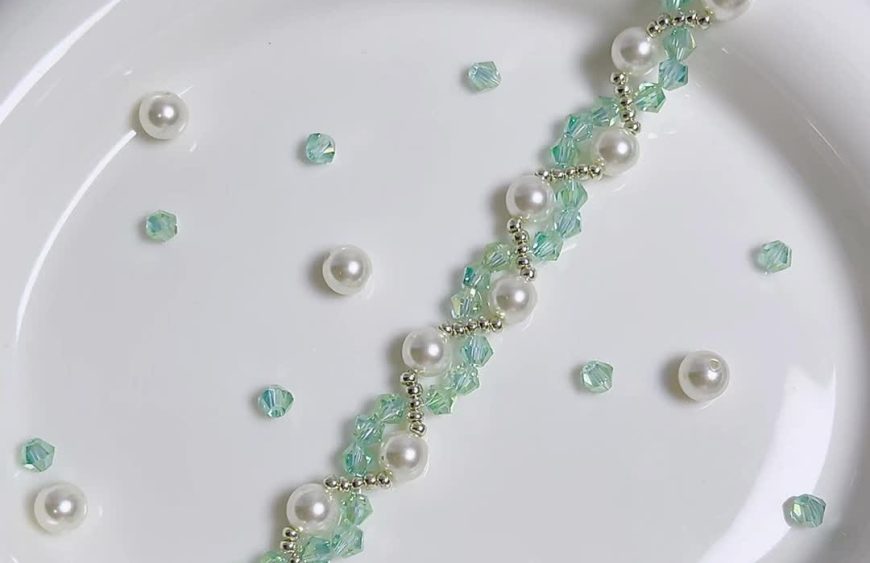
Are you looking for a jewelry project that looks high-end but is surprisingly simple to make? This Green Rhombus Crystal and Pearl Bracelet captures a fresh, elegant aesthetic that is perfect for daily wear or special occasions.
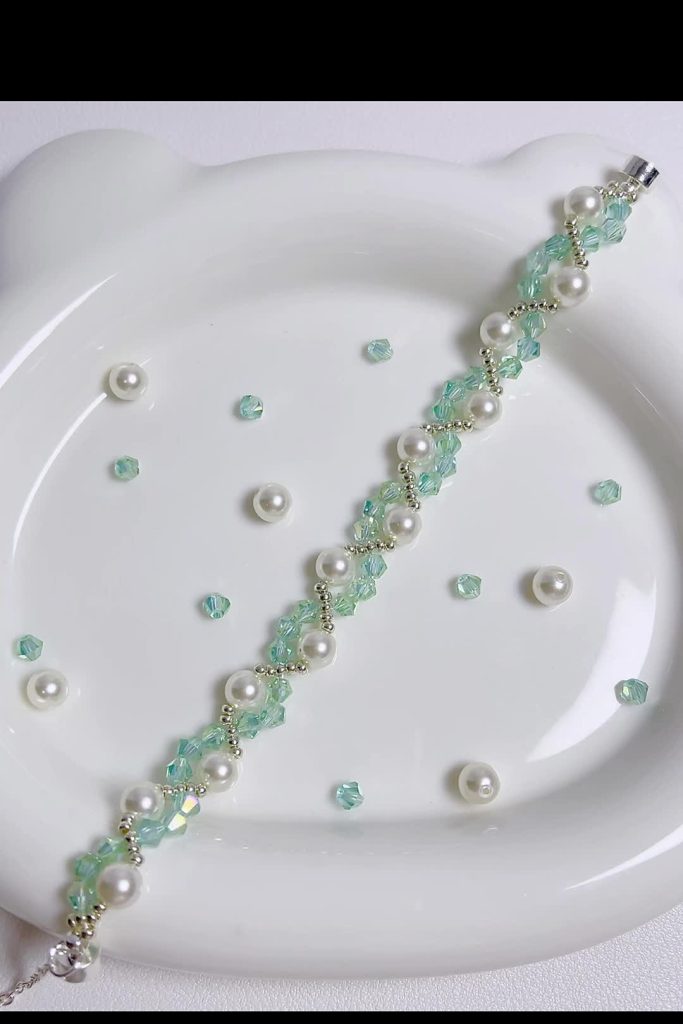
Combining the sharp sparkle of 4mm bicone crystals with the soft luster of pearls creates a beautiful textural contrast. The “zigzag” or vine-like structure allows the bracelet to drape comfortably on the wrist.
Why You’ll Love This Project:
- Beginner Friendly: Uses a simple cross-weaving technique.
- Quick Results: Can be completed in roughly 30-45 minutes.
- Customizable: The pattern works with endless color combinations.
Skill Level: Beginner
Estimated Time: 45 Minutes
Materials & Tools List
To achieve the professional finish shown in the video, precision with bead sizes is key. Here is exactly what you need:
- Crystals: 4mm Bicone (Rhombus) Crystals in Light Green (approx. 30-40 pcs depending on wrist size).
- Pearls: 6mm or 6.5mm Round Imitation Pearls in White/Cream.
- Seed Beads: Miyuki Round Seed Beads (Size 11/0 or 2mm) in Silver or Galvanized Aluminum.
- Thread: 0.2mm Clear Nylon Fishing Line or Fireline (Non-stretchy is best for structure).
- Needles: 2 Beading Needles (Size 11 or 12—Indian Pony brand suggested in video).
- Clasp: Magnetic Barrel Clasp (Silver) with loops on both ends.
- Tools: Scissors.
Step-by-Step Instructions
This tutorial uses a two-needle right-angle weave variation. Cut a comfortable length of thread (approx. 1 meter or 3 feet) and thread a needle onto each end of the line.
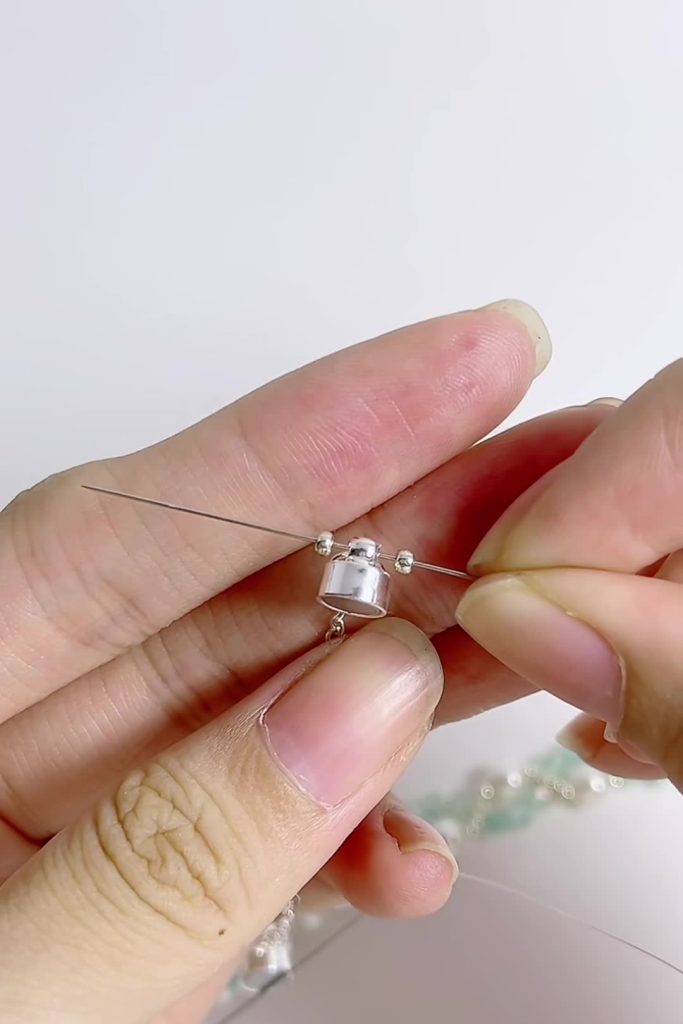
Phase 1: Starting the Base
[00:05]
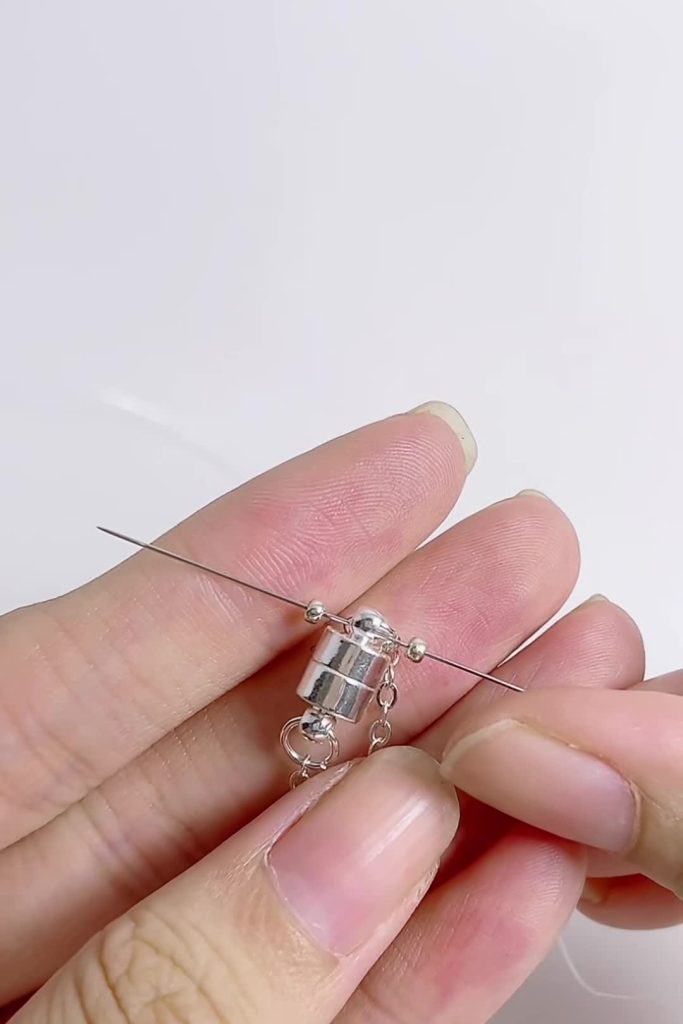
Start by sliding your magnetic clasp onto the center of your thread. To secure it, thread one seed bead onto one needle. Take the other needle and pass it through that same seed bead in the opposite direction (cross-pass). Pull threads tight so the seed bead sits flush against the clasp loop.
Phase 2: Building the Pattern
[00:10]
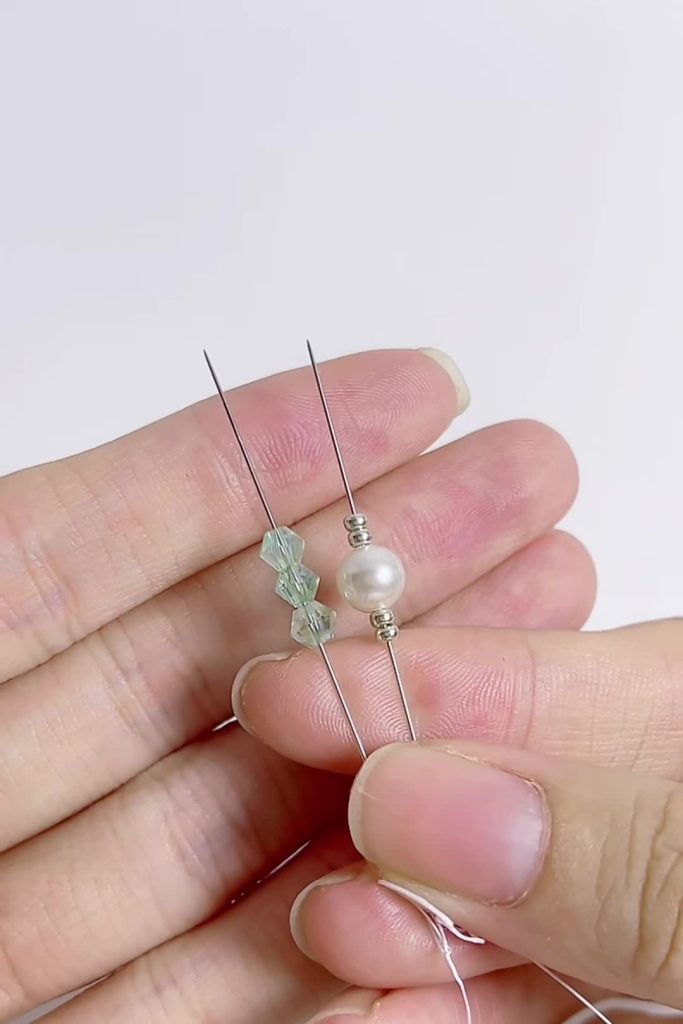
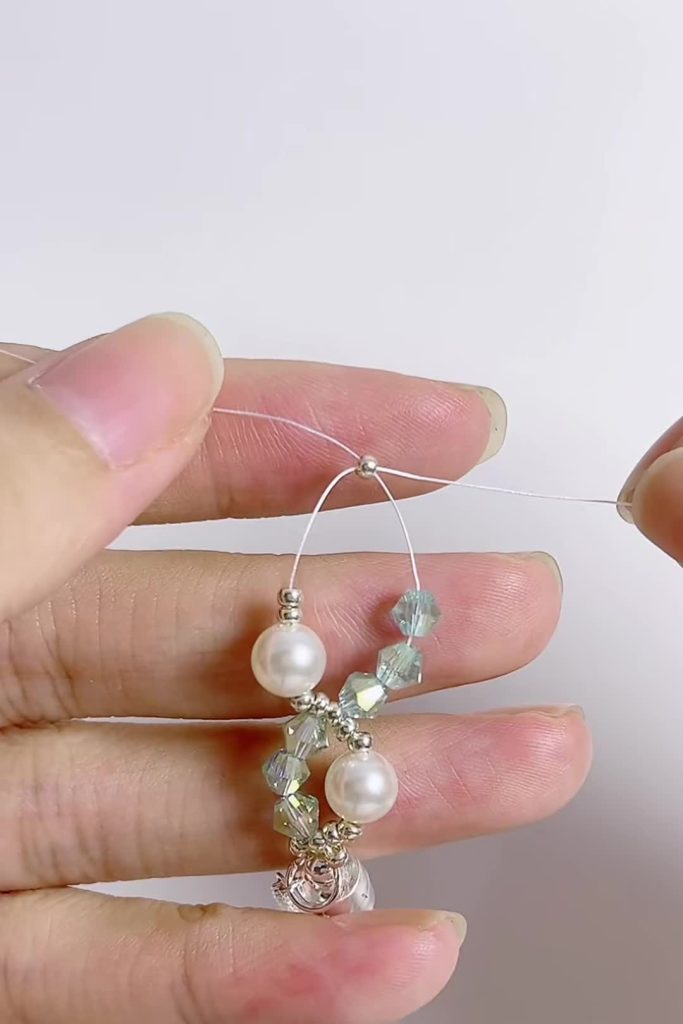
Separate your left and right needles.
- On the Left Needle: Thread 1 Pearl + 1 Seed Bead.
- On the Right Needle: Thread 3 Green Crystals + 1 Seed Bead.
- Note: Ensure you are consistent with which side takes the pearl and which takes the crystals to maintain the spiral/wave effect.
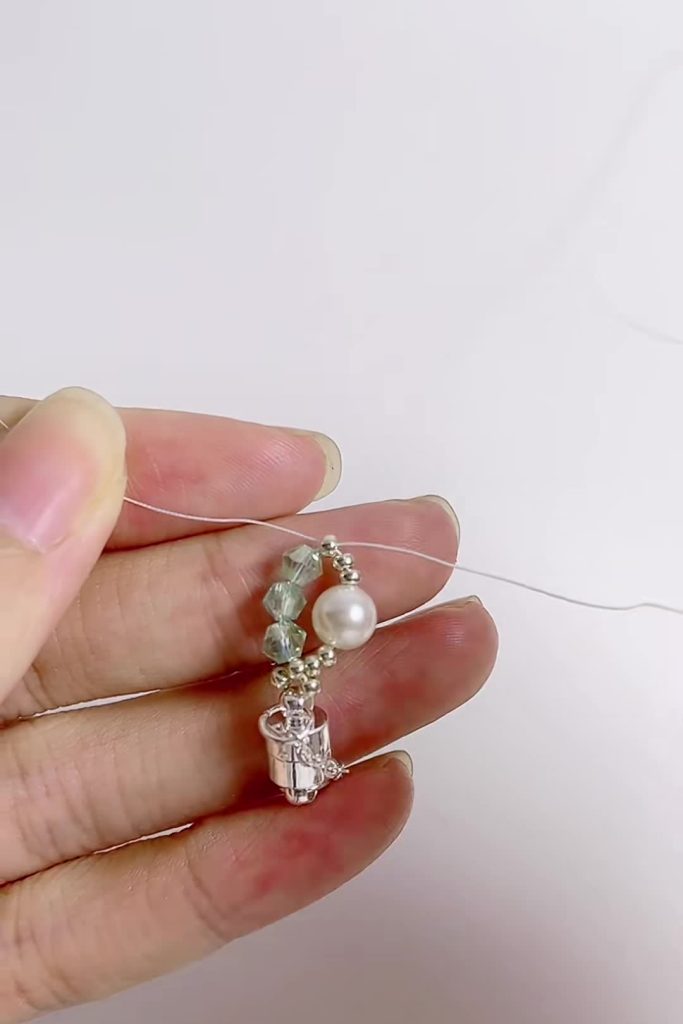
[00:14]
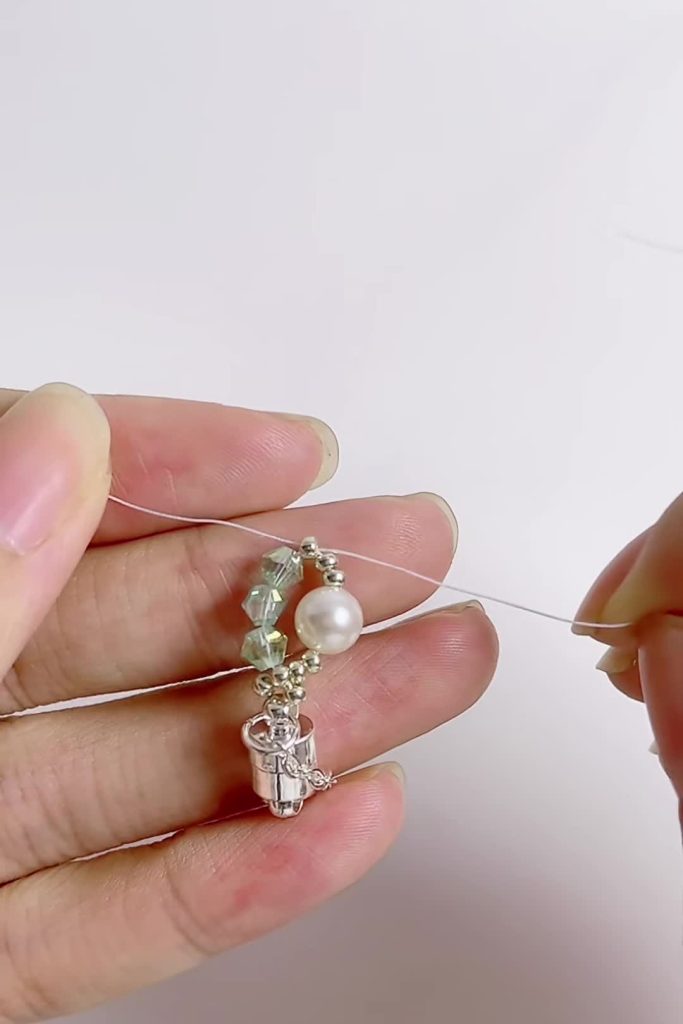
Pick up one new seed bead. Cross both needles through this bead in opposite directions. Pull the threads tight. You will see the crystals curve around one side while the pearl sits on the other.
Phase 3: The Second Segment
[00:15]
Now, reverse the orientation (or maintain, depending on desired symmetry, but the video suggests alternating the “wave”).
- Thread the specific beads as shown: 1 Pearl + 1 Seed Bead on one side, and 3 Crystals + 1 Seed Bead on the other.
[00:18]
Cross both needles through a single new seed bead to lock the segment in place. Give the thread a firm tug to ensure there are no gaps between the beads.
Phase 4: Repetition
[00:20]
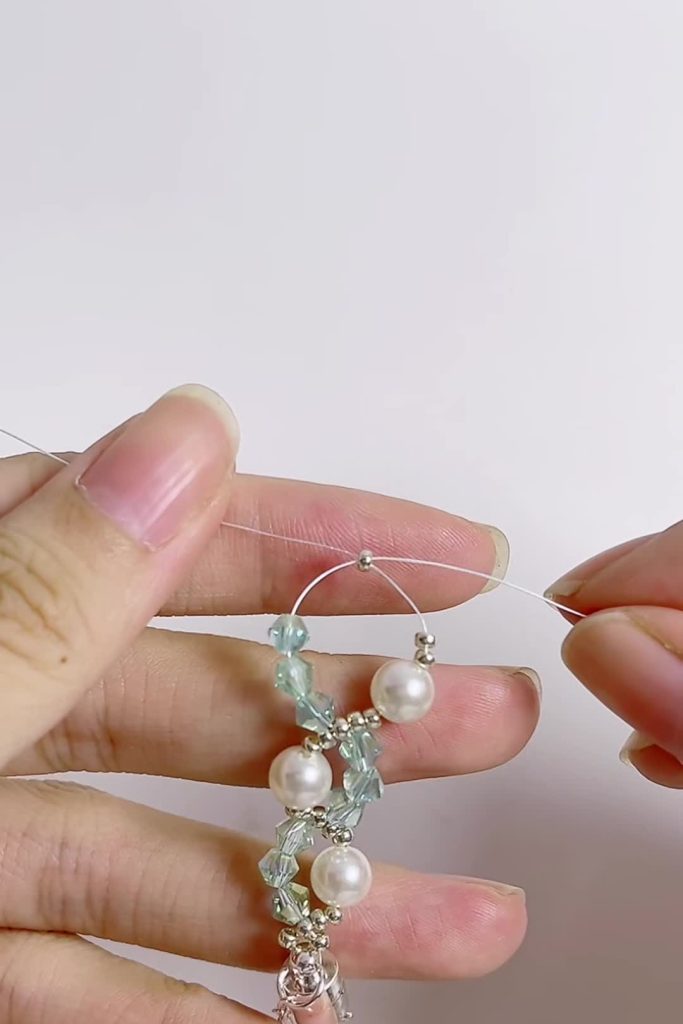
Continue this exact sequence. As you build length, check the bracelet against your wrist. The pattern of Pearls vs. Crystals should create a lovely twisting vine effect.
Phase 5: Finishing the Bracelet
[00:26]
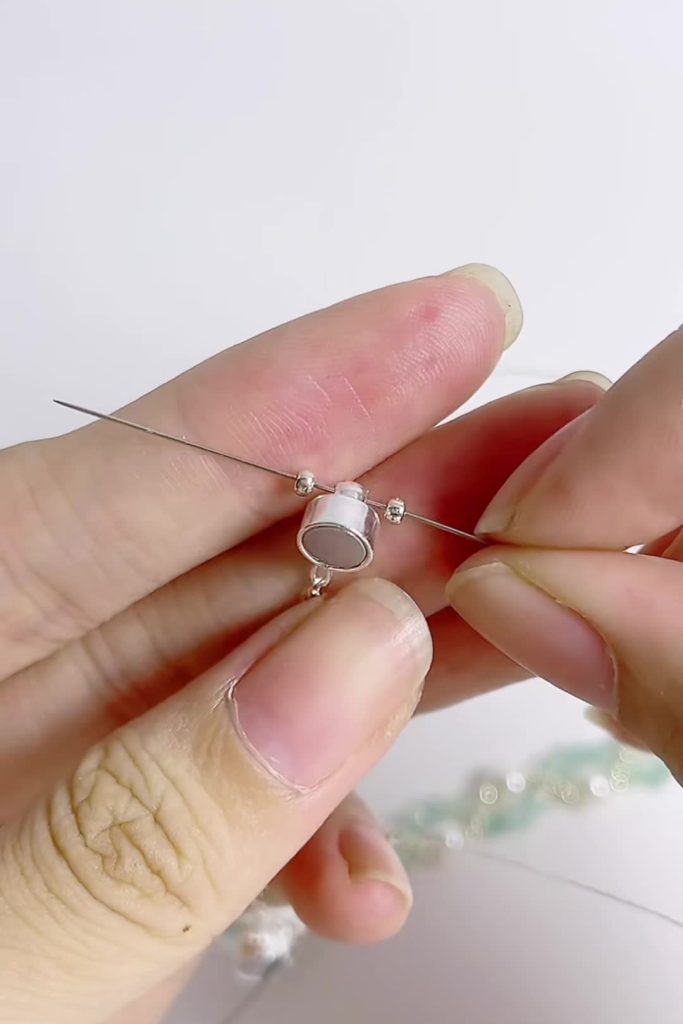
Once you reach your desired length, it is time to attach the other half of the clasp. Thread one seed bead on both the left and right strands (one on each).
[00:27]
Bring the threads together and pass them through the loop of the second part of the magnetic clasp.
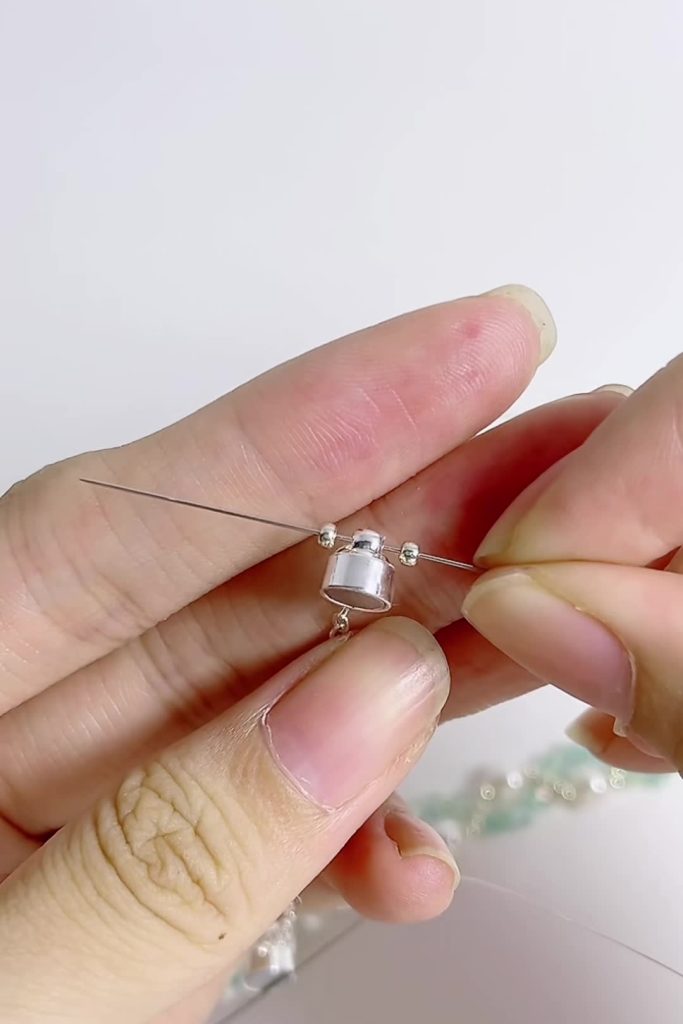
[00:28]
To secure the knot, weave your threads back down through the final seed beads and the last pattern segment. Tie a surgeon’s knot (a double overhand knot) between the beads. Apply a tiny drop of glue to the knot if desired, trim the excess thread, and hide the knot inside a pearl or crystal.
Troubleshooting & Pro-Tips
- My bracelet is twisting too much: This pattern naturally has a slight twist, which is part of the beauty. However, if it curls up like a snake, your thread tension is too tight. Relax your pull slightly after each cross-step.
- The beads don’t fit the needle: If you are using real pearls or gemstones, holes can be small. Ensure you are using a Size 11 or Size 12 beading needle, which is thinner than a standard sewing needle.
- The clasp feels loose: Magnetic clasps are heavy. Reinforce the connection by passing your thread through the clasp loop and the first seed bead twice before starting the pattern.
Variations & Styling Ideas
- The “Royal” Look: Swap the green crystals for Deep Blue and the silver seed beads for Gold.
- Bridal Style: Use Clear/AB Crystals and white pearls for an all-white, sophisticated wedding accessory.
- Minimalist: Use 3mm crystals and 4mm pearls for a daintier, thinner chain.
Frequently Asked Questions (FAQ)
Q: Can I use elastic string for this project?
A: It is not recommended. The weight of the crystals and pearls requires the structure of non-stretchy nylon (fishing line) or beading thread like Fireline to hold the “vine” shape correctly. Elastic may cause the bracelet to sag.
Q: How do I know how long to make the bracelet?
A: Measure your wrist tightly and add roughly 1.5cm to 2cm (approx 0.75 inches). Because this bracelet uses chunky pearls (6mm), it takes up more inner circumference than a flat bracelet.
Q: What if I don’t have a magnetic clasp?
A: You can easily substitute a lobster claw clasp and a jump ring. The attachment method (Step 1 and Step 6) remains exactly the same.
Q: Where can I find bicone crystals?
A: You can find 4mm bicone crystals at most craft stores, or online search for “Austrian Crystal Bicones” or “Preciosa Bicone Beads” for the highest sparkle.