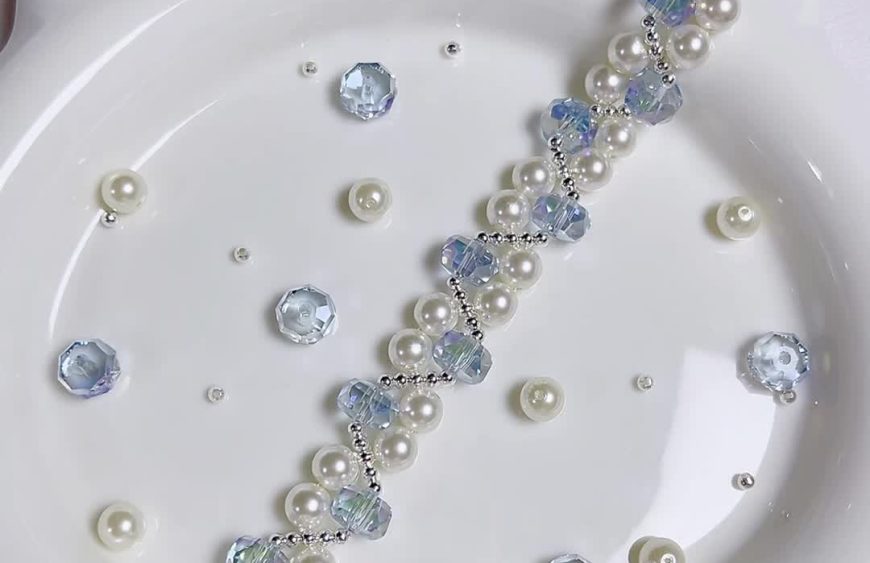
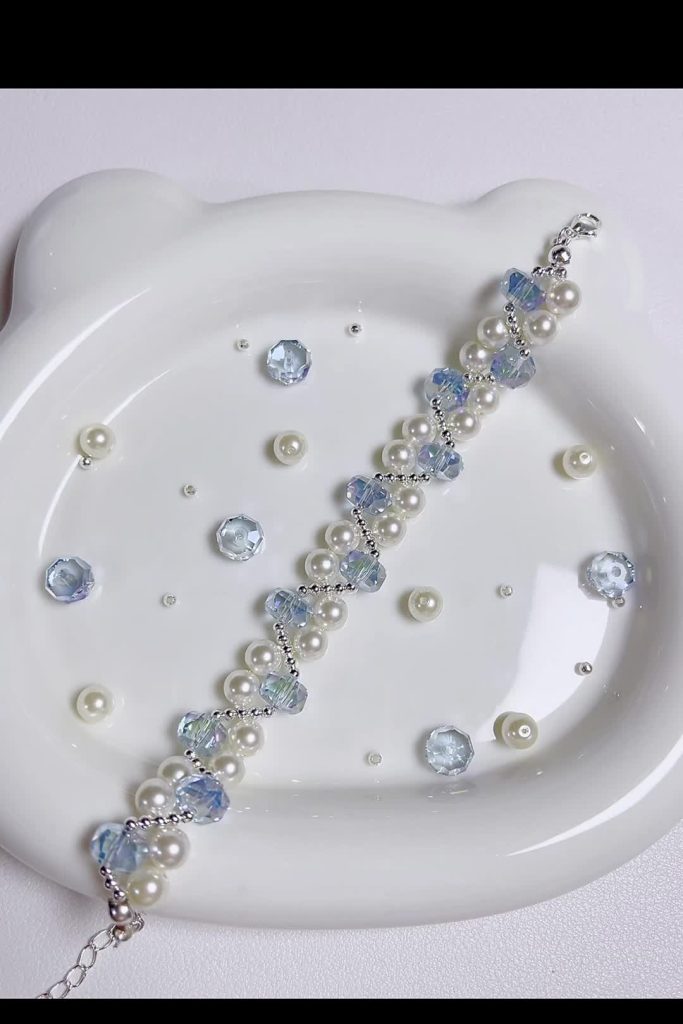
Create a jewelry piece that looks like it came straight from a luxury boutique! This DIY Crystal and Pearl Bracelet combines the soft elegance of pearls with the sharp brilliance of bicone crystals in a mesmerizing “wave” or “zig-zag” pattern.
Despite its intricate appearance, this project uses a simple cross-weaving technique that even beginners can master. Whether you are making a bridal accessory or a gift for a friend, this tutorial will guide you to a professional finish.
- Difficulty: Beginner to Intermediate
- Time Estimate: 30–45 Minutes
- Cost: Low (depending on bead quality)
Why You’ll Love This Project
- High-End Look: The combination of 4mm bicone crystals and pearls mimics high-end brands like Swarovski.
- Customizable: You can easily swap the blue crystals for pink, clear, or black to match any outfit.
- Sturdy Design: Using non-elastic fishing line ensures the bracelet lasts for years without stretching.
🧵 Materials & Tools List
To achieve the “Explosive Flash” look shown in the video, precise sizing is key.
- Beads (A): 4mm Bicone Crystals (Austrian or Swarovski style). Color used: Light Blue/AB finish.
- Beads (B): 3mm – 4mm Round Imitation Pearls. Color used: White/Cream.
- Spacers: 2mm Smooth Round Spacer Beads (Gold or Silver plated).
- Clasp: 10K Gold-filled or Sterling Silver Lobster Clasp with extension chain.
- Thread: 0.2mm Non-elastic Fishing Line or Fireline (Clear).
- Tools: Scissors, Ruler.
📝 Step-by-Step Instructions
Follow these precise steps to recreate the wave pattern.
Phase 1: Attaching the Clasp
[00:05] Cut a comfortable length of fishing line (approx. 80cm-100cm). Thread your lobster clasp onto the line and slide it to the exact center of the thread.
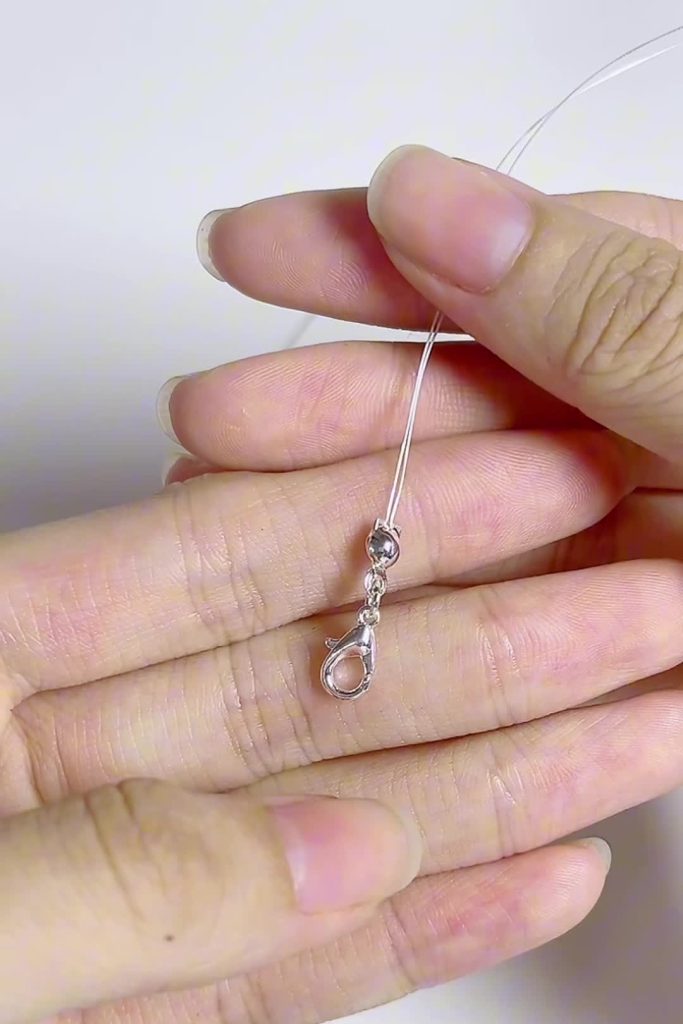
[00:07] Take one 2mm spacer bead. Thread the left wire through the bead, and then take the right wire and cross it back through that same bead in the opposite direction. Pull tight. This creates a small loop that secures the clasp in place.
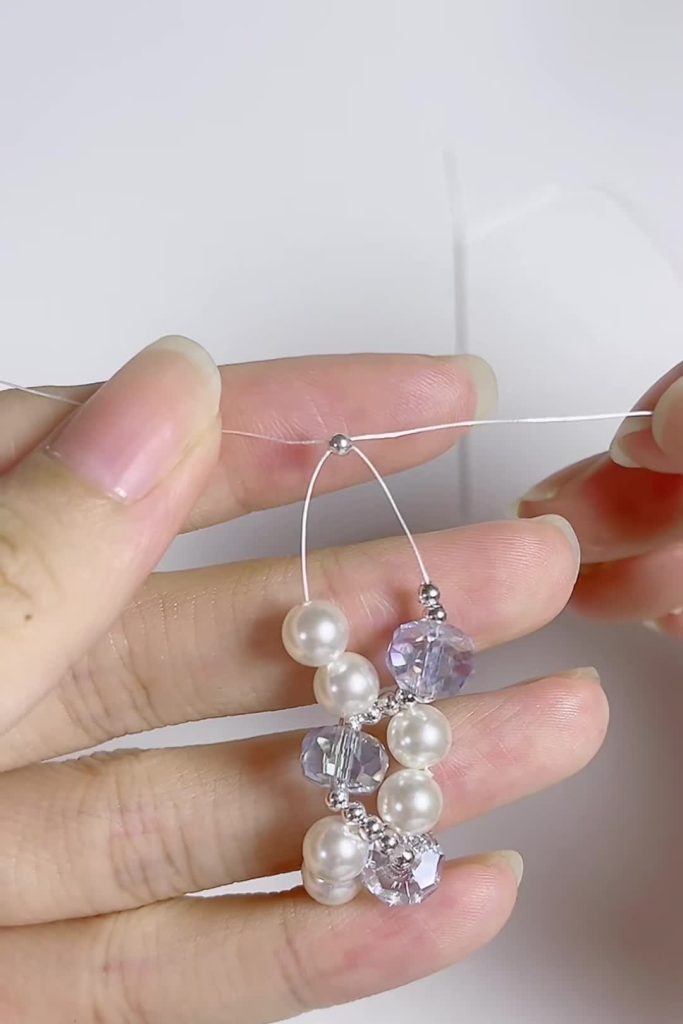
Phase 2: The First Wave (Curve A)
[00:10] Separate your threads. On the Left Needle, thread two (2) Pearls.
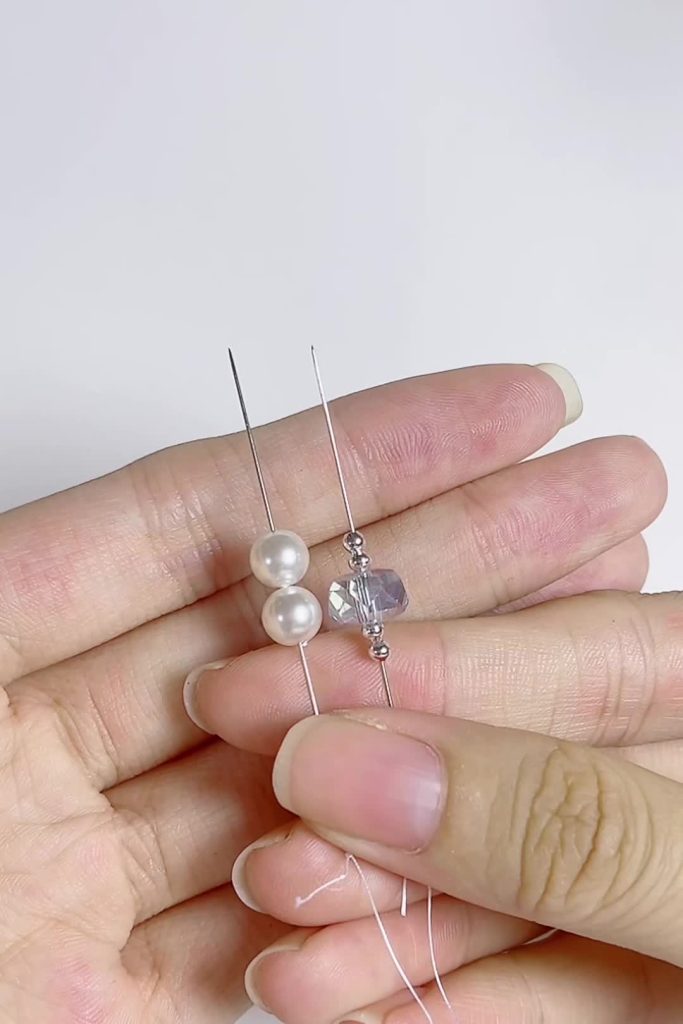
[00:11] On the Right Needle, thread beads in this specific order: One (1) Spacer Bead + One (1) Crystal + One (1) Spacer Bead.

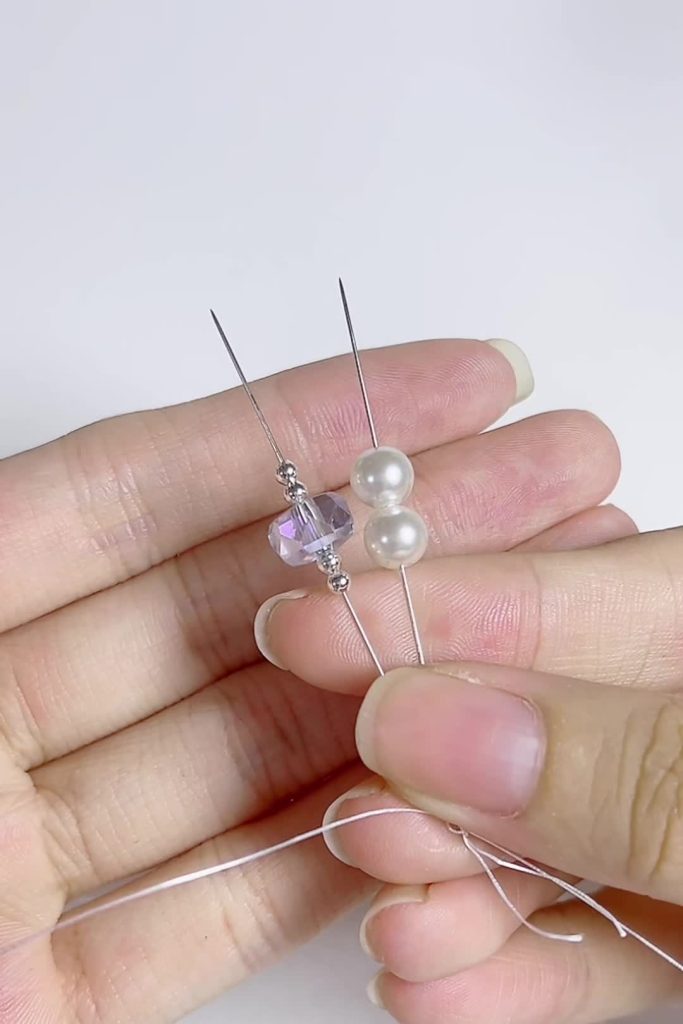
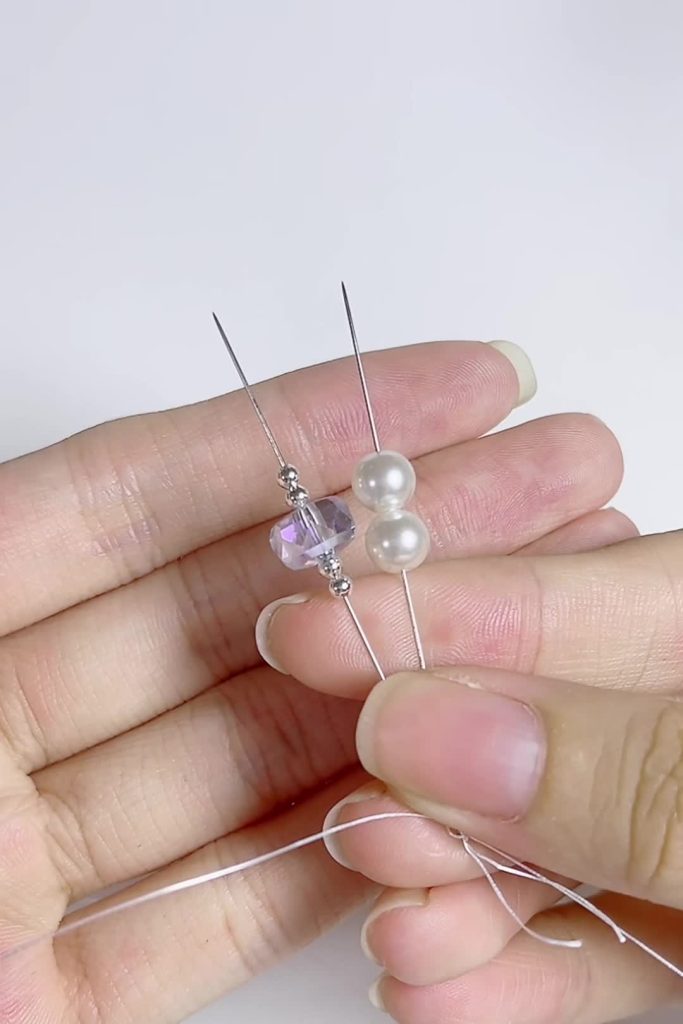
[00:13] Pick up a new 2mm spacer bead. Cross both the Left and Right threads through this spacer bead in opposite directions. Pull both threads tight. You will see the pearls arching on one side and the crystal on the other.
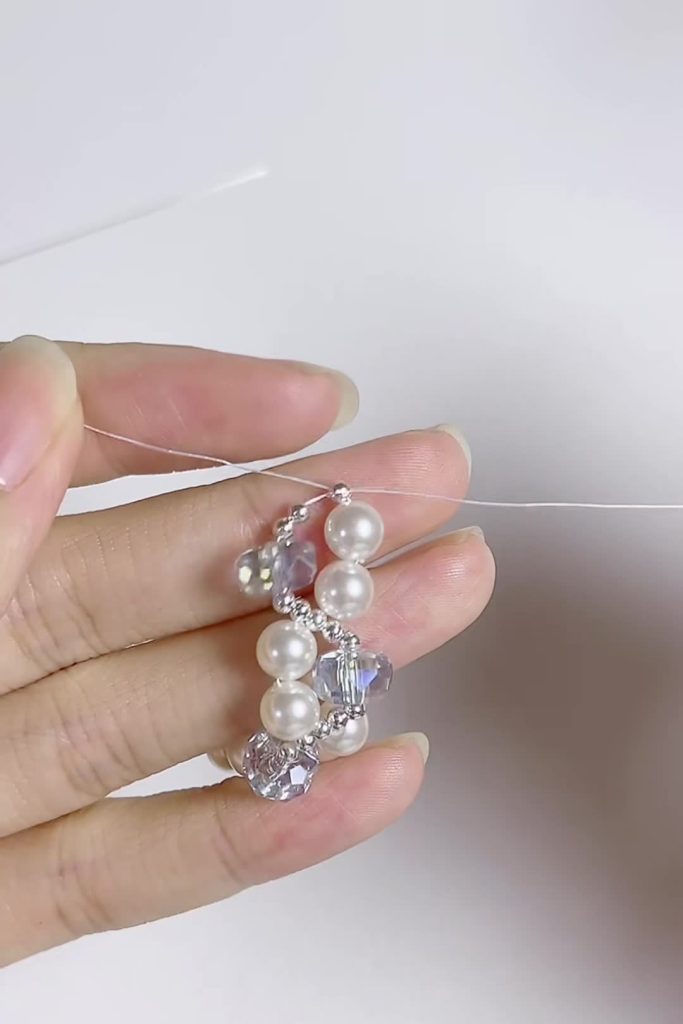
Phase 3: The Second Wave (Curve B)
[00:16] Now, we reverse the order to create the zig-zag effect. On the Left Needle, thread: One (1) Spacer Bead + One (1) Crystal + One (1) Spacer Bead.
[00:17] On the Right Needle, thread: two (2) Pearls.
[00:19] Pick up a new 2mm spacer bead. Cross both threads through this bead and pull tight. Notice how the pearls are now on the opposite side compared to the first step.
Phase 4: Repetition
[00:22] Repeat Phase 2 and Phase 3 continuously. Always remember to alternate which side gets the pearls and which gets the crystal/spacer combo.
- Cycle 1: Left = Pearls / Right = Crystal Combo.
- Cycle 2: Left = Crystal Combo / Right = Pearls.
[00:25] Continue this pattern until the bracelet reaches your desired wrist length (usually about 6 to 6.5 inches, excluding the clasp).
Phase 5: Finishing Off
(Not explicitly shown, but standard finish for this weave): Once you reach the end, thread the extension chain onto the wire. Cross your wires back through the last bead pattern to create a loop. Tie 2-3 surgical knots securely. Thread the excess wire back through 3-4 previous beads to hide the tail, then trim.
🛠️ Troubleshooting & Pro-Tips
- The “Buckling” Issue: If your bracelet looks crooked, you aren’t pulling the tension tight enough after every “cross-over” step. The fishing line must be taut for the wave to hold its shape.
- Bead Sizing: If you use pearls larger than 4mm, the bracelet will curve too sharply. Stick to 3mm or 4mm pearls paired with 4mm crystals for the perfect ratio.
- Thread Choice: Do not use elastic string. The weight of the glass crystals and pearls requires the structure of non-elastic fishing line to sit correctly on the wrist.
🎨 Styling Variations
- The “Bridal” Edition: Use clear AB crystals and cream pearls with silver hardware for a classic wedding look.
- The “Gothic” Edition: Use black bicone crystals and dark grey pearls with gunmetal spacers.
- The “Mixed Metal” Edition: Use gold pearls and silver crystals for a trendy mixed-metal vibe.
❓ Frequently Asked Questions (FAQ)
Q: Can I use Fireline instead of fishing line?
A: Yes! Fireline (6lb or 8lb test) is an excellent choice. It is strong, thin, and doesn’t stretch, making it perfect for crystal weaving.
Q: How do I know how long to cut the thread?
A: A general rule of thumb is your finished bracelet length x 4. For a standard wrist, 1 meter (or 1 yard) is usually plenty of room to work without running out.
Q: My spacer beads keep slipping inside the pearls. Why?
A: Your spacer beads might be too small, or your pearl holes too large. Ensure your spacer beads are at least 2mm so they act as a proper stopper between the larger beads.
Q: Can I make this a necklace instead?
A: Absolutely. Just continue the pattern repeats until you reach 16-18 inches. This design creates a beautiful collarbone necklace that lays flat.
Did you try this Sparkling Crystal Bracelet? Let us know in the comments how it turned out!