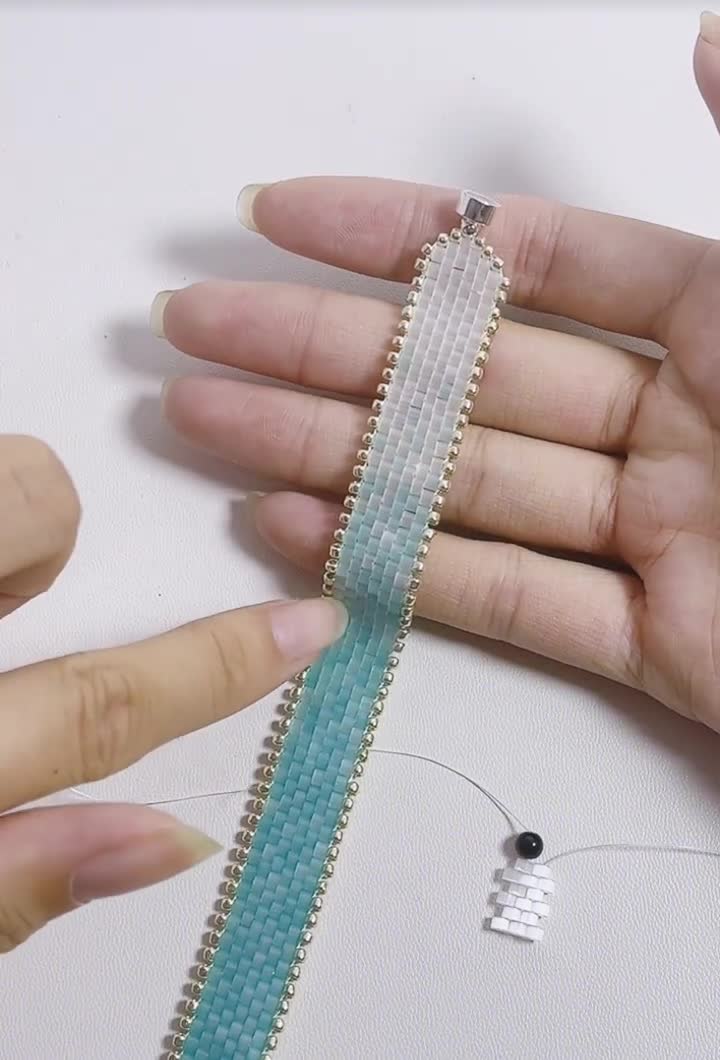
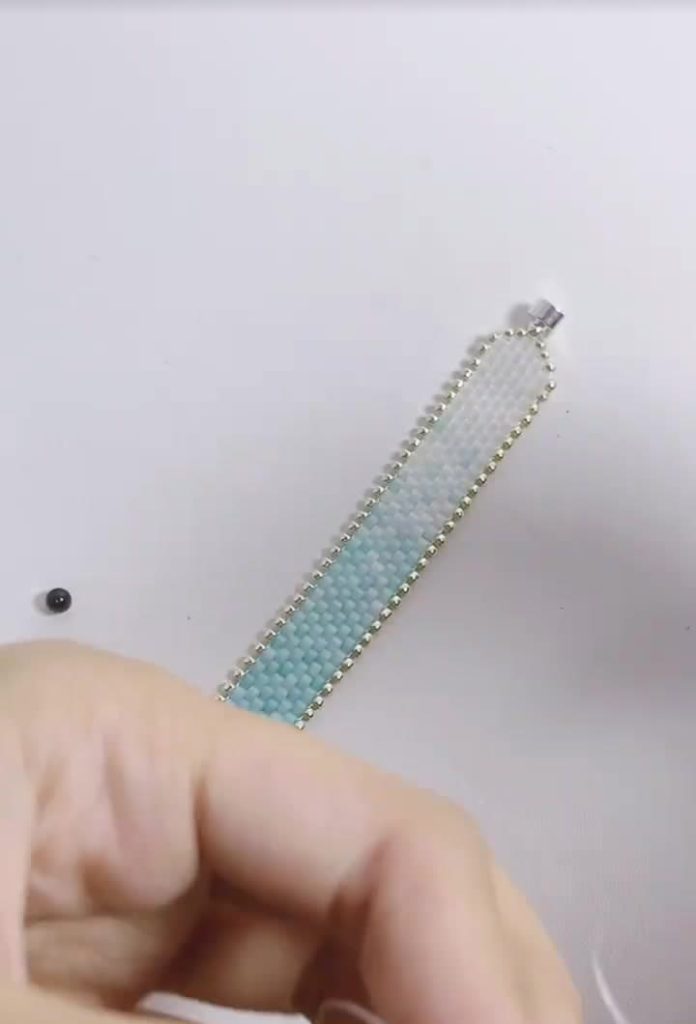
Master the art of color transition with this elegant, heirloom-quality bracelet tutorial.
Are you looking for a jewelry project that looks high-end but is surprisingly simple to construct? This DIY Gradient Beaded Bracelet uses a clever variation of the Ladder Stitch to create a fluid, vintage-inspired design.
The secret lies in the combination of cylinder beads (for that sleek, “antique” tile look) and round seed beads (for delicate edging). The result is a soft, shimmering cuff that transitions seamlessly from white to deep ocean blue.
In this guide, we’ll break down the viral video tutorial into easy-to-follow steps, ensuring your finished piece looks professional and polished.
💎 Why You’ll Love This Project
- High-End Look: The “brick-like” structure of the beads mimics expensive loom work without needing a loom.
- Customizable: You can easily swap the blue gradient for a sunset (yellow-orange-red) or grayscale palette.
- Beginner Friendly: It relies mostly on repetitive stitching patterns.
Difficulty: Intermediate (Requires consistent tension)
Time Estimate: 2 – 3 Hours
🧵 Materials & Tools List
To achieve the precise, “tiled” look shown in the video, bead shape matters. Do not use standard uneven craft beads.
- Main Beads (The “Antique” Beads): 2mm Cylinder Beads (Recommended: Miyuki Delica 11/0 or Toho Aiko).
- Color A: Opaque White
- Color B: Light Sky Blue
- Color C: Lake Blue / Teal
- Color D: Dark Blue-Green
- Accent Beads: 2mm or 15/0 Round Seed Beads (Metallic Gold or Silver).
- Thread: Beading thread (Recommended: Fireline 6lb or Miyuki Beading Thread) in white or crystal.
- Needle: Size 10 or 12 Beading Needle.
- Clasp: Magnetic Tube Clasp (Silver) matching the width of the bracelet.
- Scissors & Burner: For trimming thread.
📝 Step-by-Step Instructions
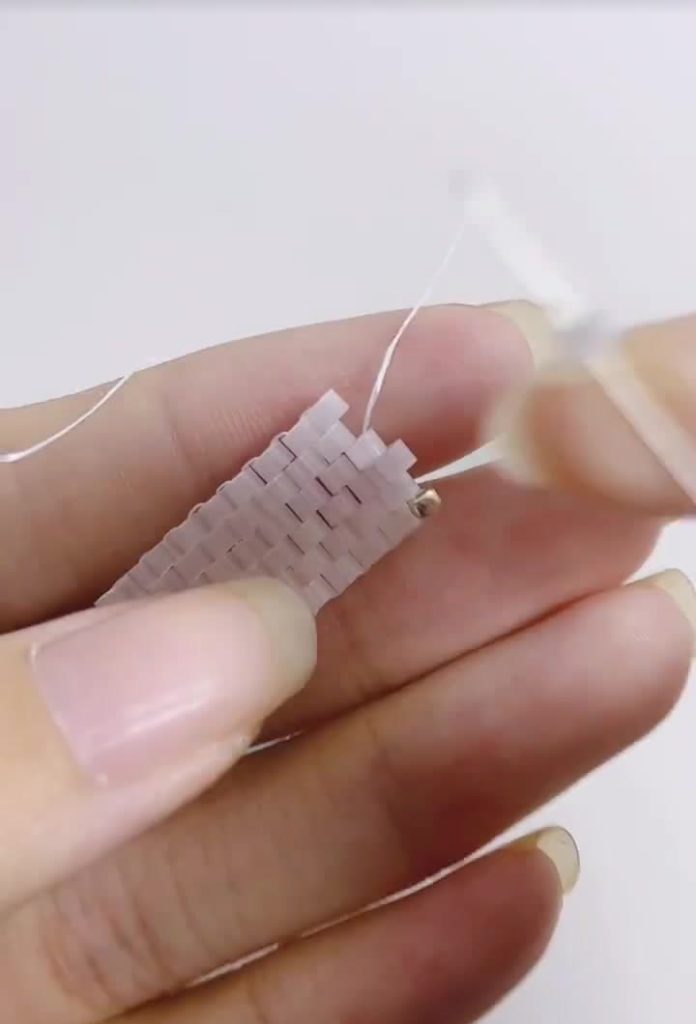
Phase 1: Creating the Center Ladder Strip
The foundation of this bracelet is a two-column wide strip created using Ladder Stitch.
[00:05] Starting the Base
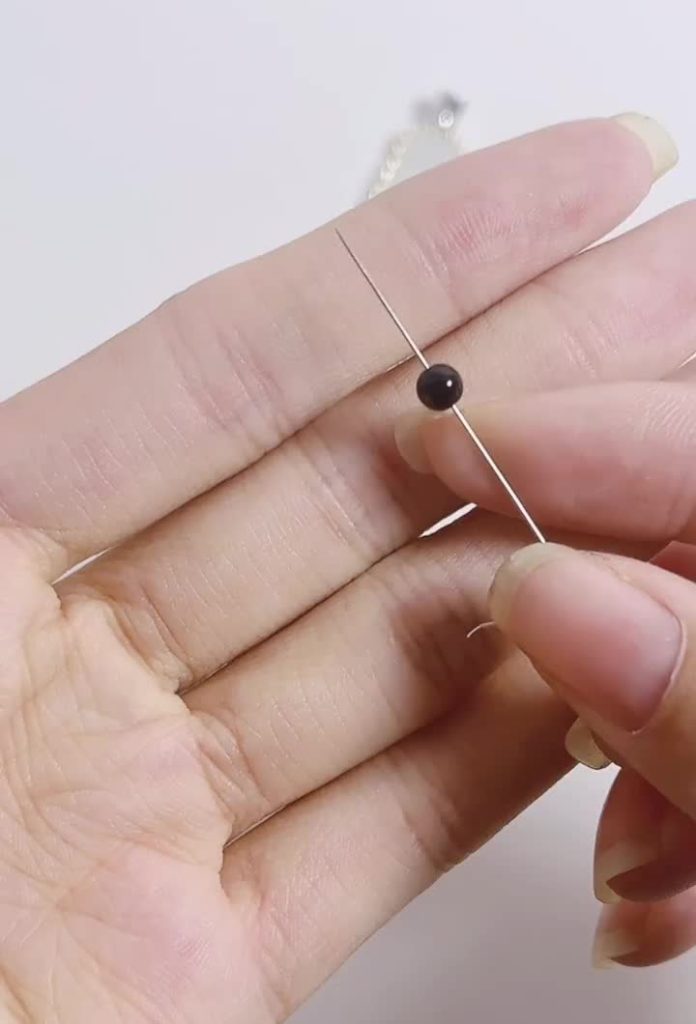
- Thread your needle with a comfortable length of thread (approx. 1.5 yards).
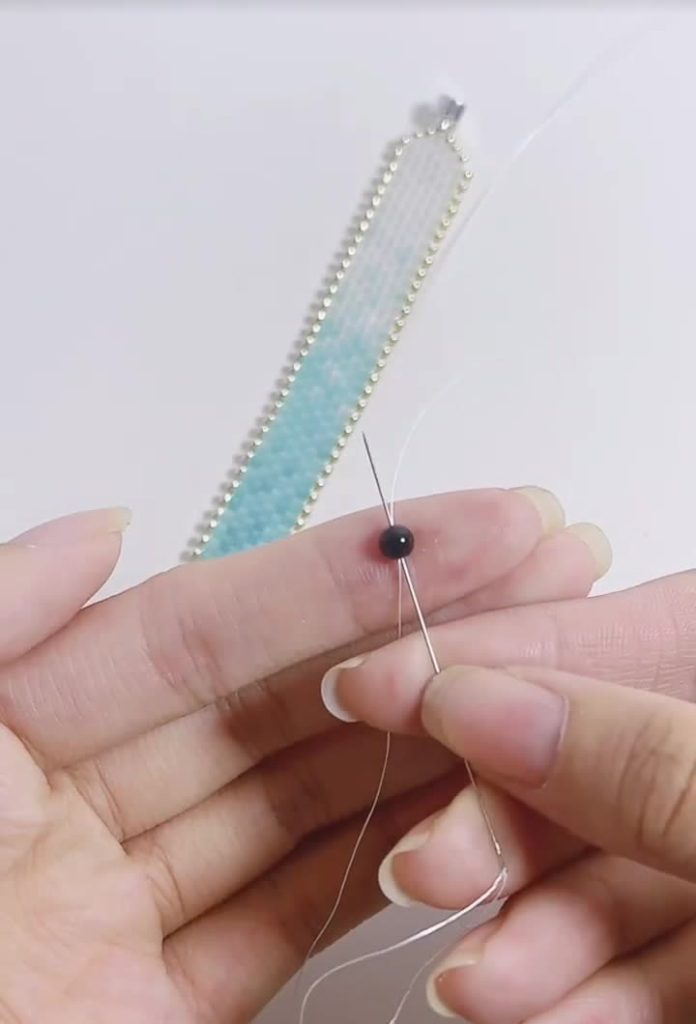
- String one “stopper bead” (a temporary bead to hold beads in place) or leave a 6-inch tail.
- String 2 White Cylinder Beads.
- Loop back through the first bead to create a loop. The beads should sit side-by-side.
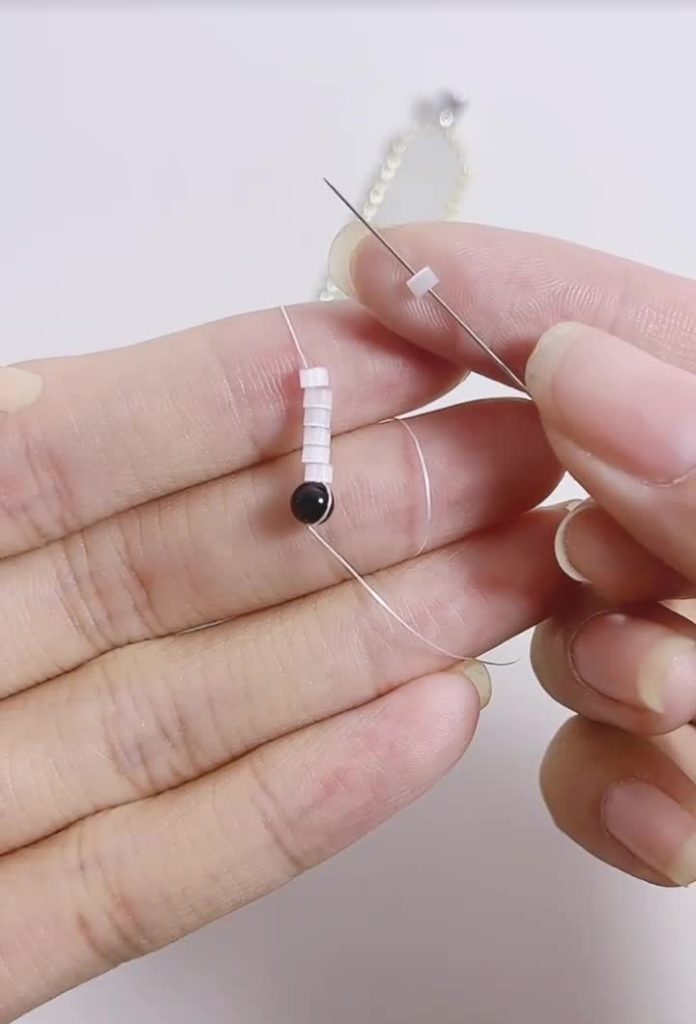
[00:10 – 00:25] Building the Ladder
- Pick up 1 White Cylinder Bead.
- Pass your needle through the bead directly next to it (from the previous row).
- Pull tight so the new bead snaps into place next to the previous one.
- Reinforce by passing back through the new bead.
- Technique Note: You are building a long, thin strip that is exactly two beads wide.
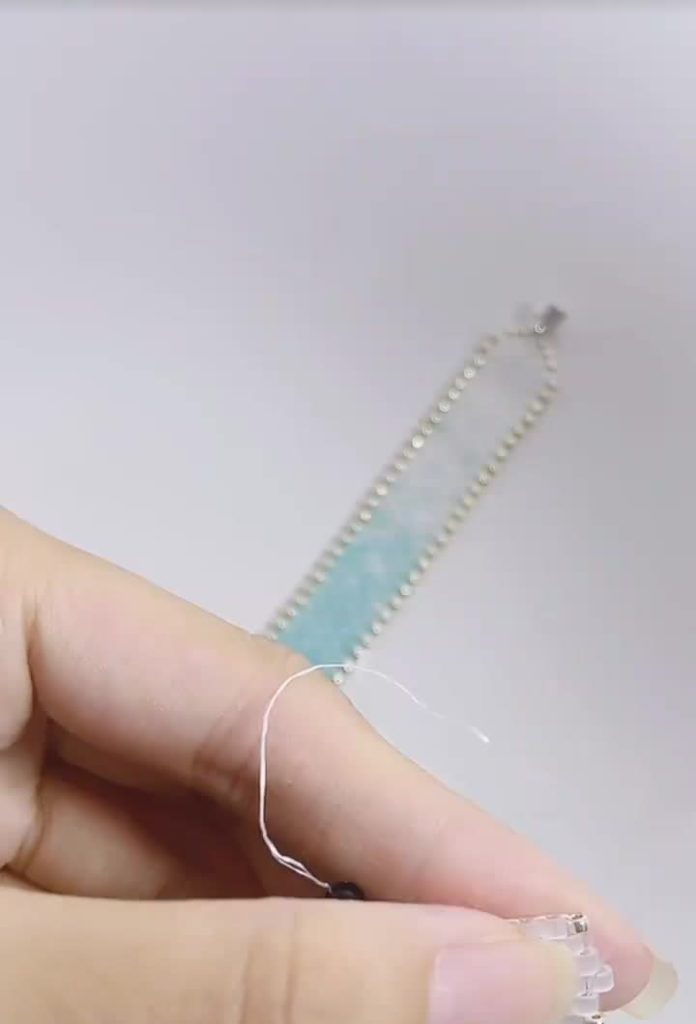
[00:37 – 00:48] The Gradient Transition
- Continue the ladder stitch for approximately 2cm using White beads.
- Switch Colors: Now, construct the next section using 1 White Bead + 1 Light Blue Bead per row to start blending, or switch directly to Light Blue for a block effect.
- Gradient Pattern:
- Section 1: White
- Section 2: Light Blue
- Section 3: Lake Blue
- Section 4: Dark Blue-Green
- Continue until the strip fits comfortably around your wrist (approx. 6-7 inches total).
Phase 2: Adding the Side Wings
Now that you have a long center strip, we will build the width of the bracelet by stitching off the sides of that strip.
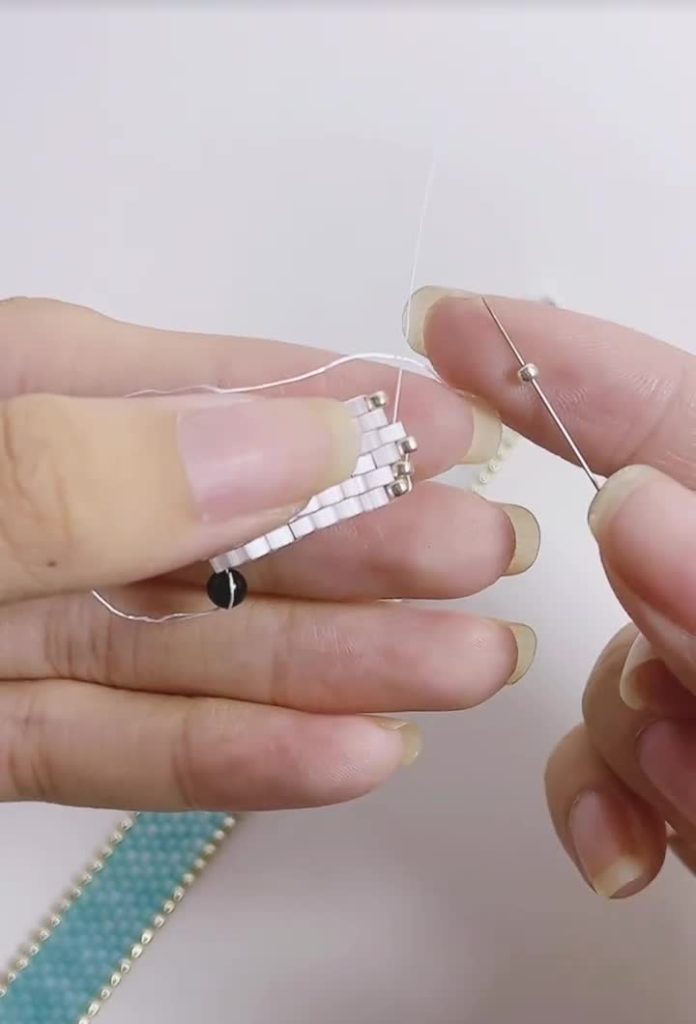
[00:49 – 01:00] The First Side Row
- Position your thread so it is exiting one of the side beads of your center strip.
- Pick up 1 Silver Round Bead + 1 Cylinder Bead (match the color of the section you are in).
- Pass your needle through the next bead along the edge of the center strip.
- Repeat this down the entire length of the bracelet. This creates a “fringe” sticking out from the center strip.
[00:55] Expanding the Width
- Once you reach the end, turn around.
- Add Cylinder Beads on top of the row you just added to create a flat, brick-like surface.
- Tip: Ensure you change bead colors to match the gradient of the center strip as you move down the line.
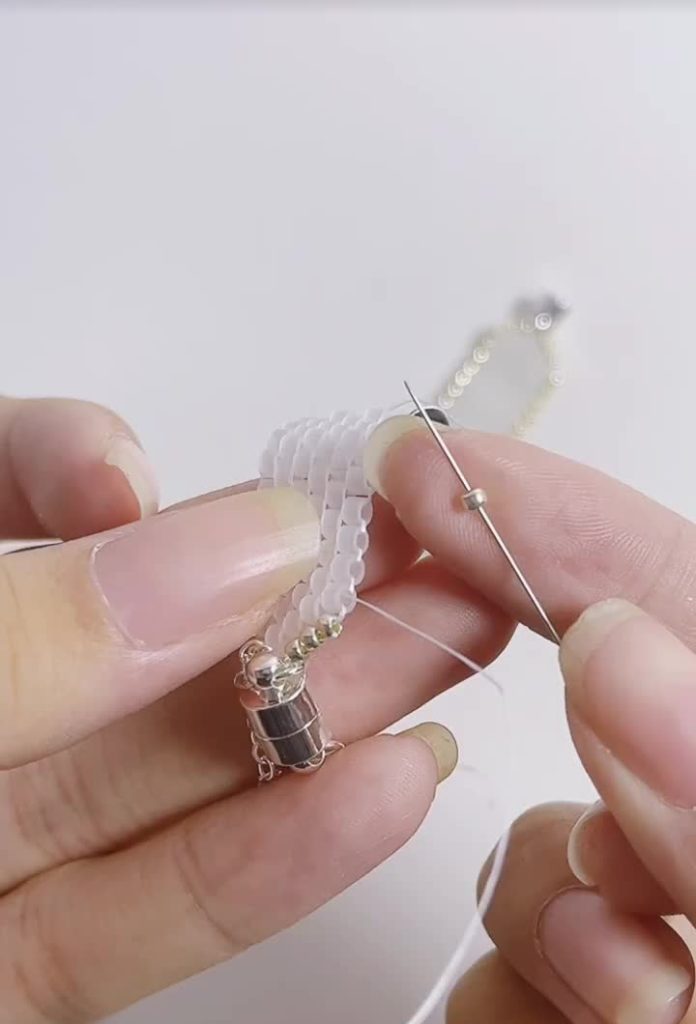
Phase 3: The Decorative Scalloped Edge
This step gives the bracelet its delicate, lace-like antique finish.
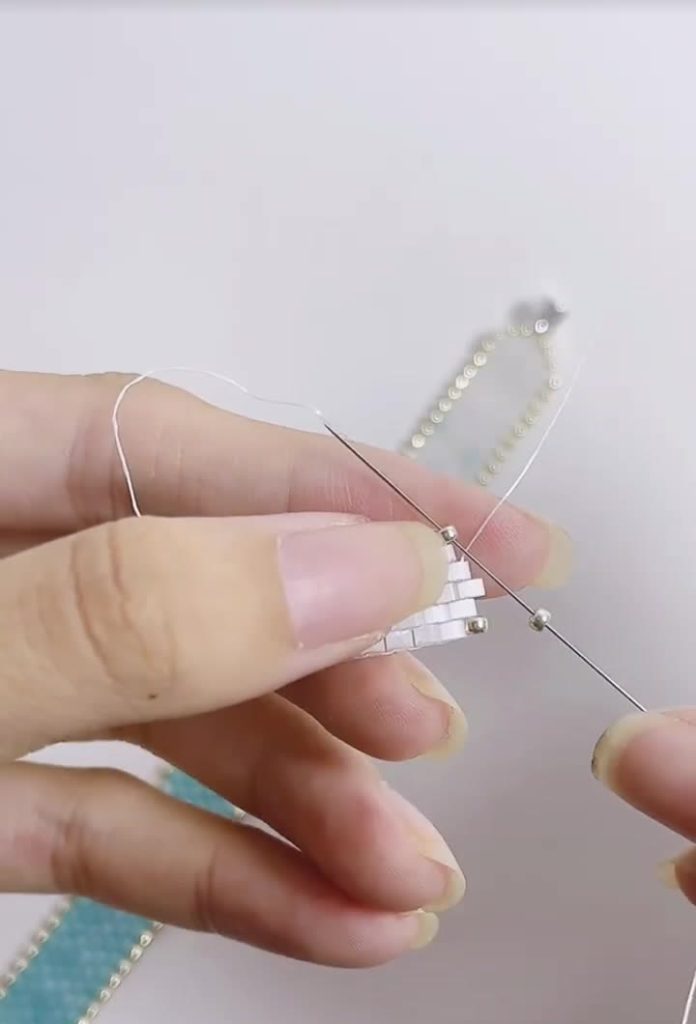
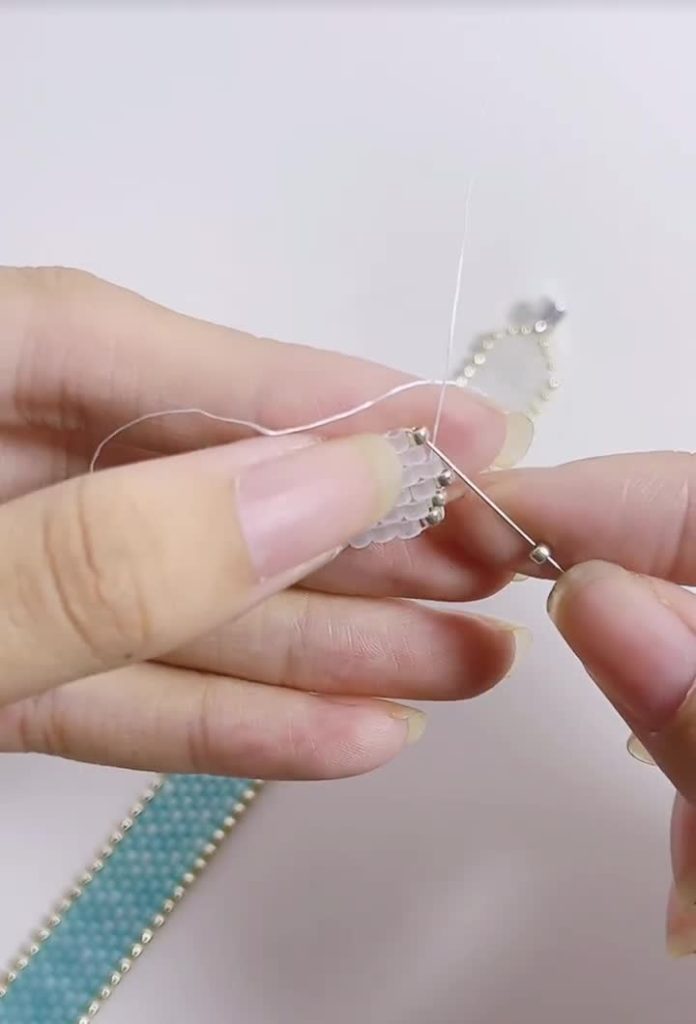
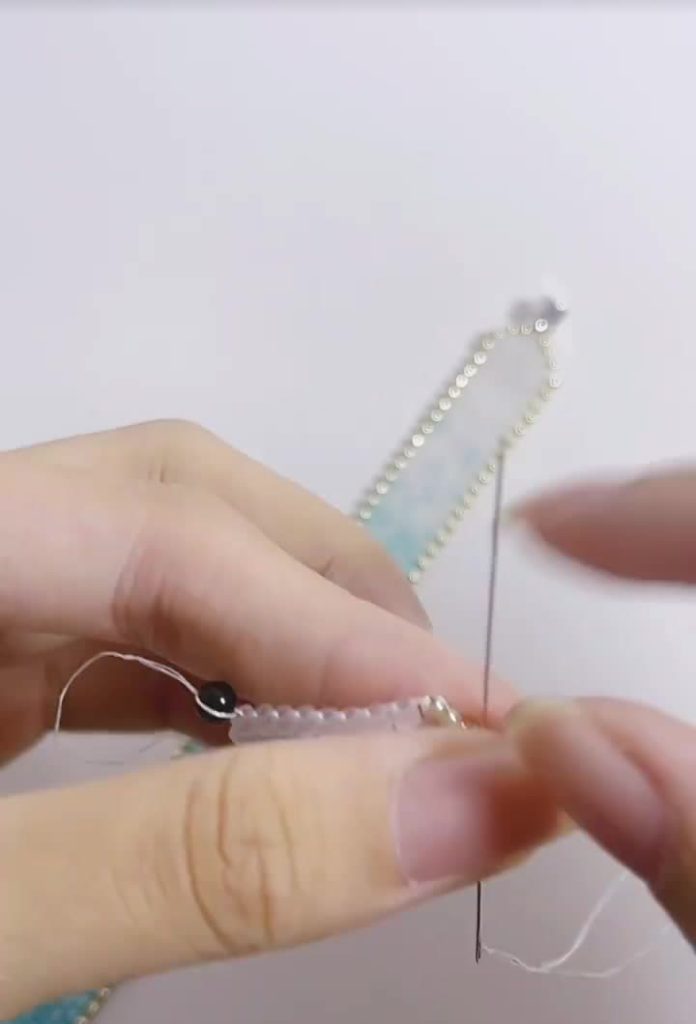
[01:03 – 01:10] Adding the Silver Picots
- Exit your thread from the outer Cylinder bead.
- Pick up 1 Silver Round Bead. Pass through the next cylinder bead.
- Pick up 2 Silver Round Beads. Pass through the next cylinder bead.
- This creates a small metallic “bump” or picot on the edge.
[01:11 – 01:15] The “Bridge” Stitch
- To stabilize the edge, you may need to pass your needle through the “bridge” threads between the beads (similar to Brick Stitch) to ensure the silver beads sit flat and point outwards.
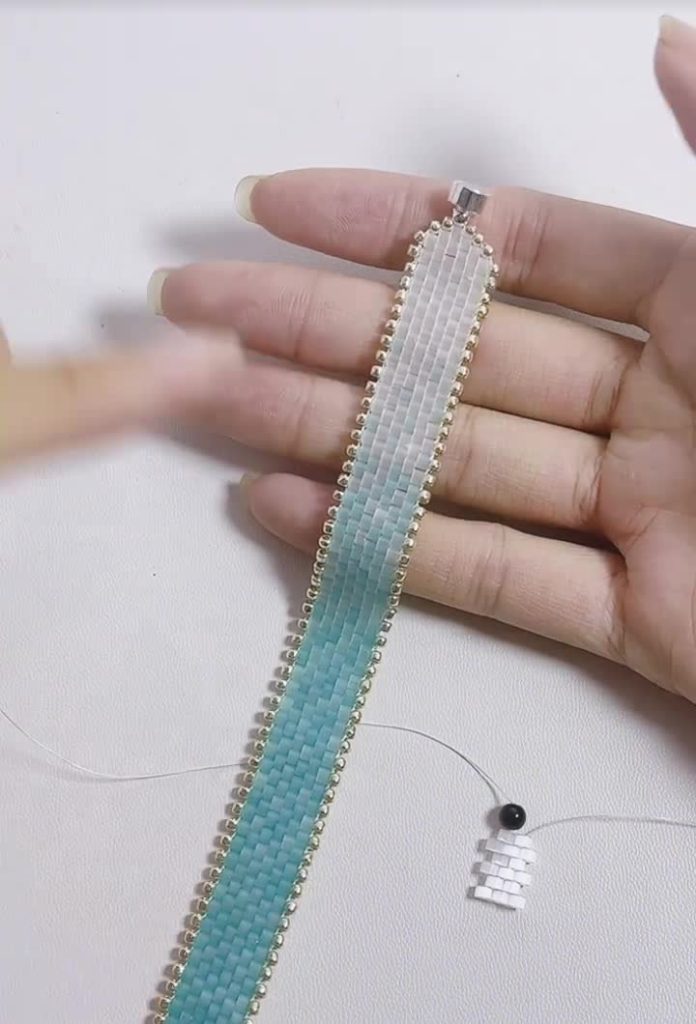
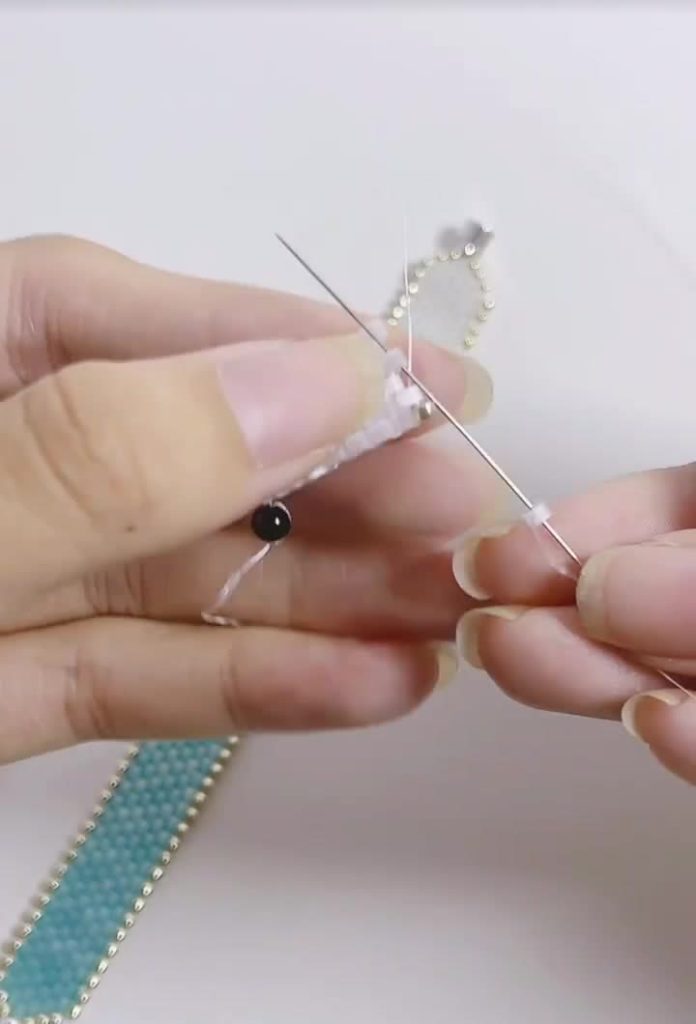
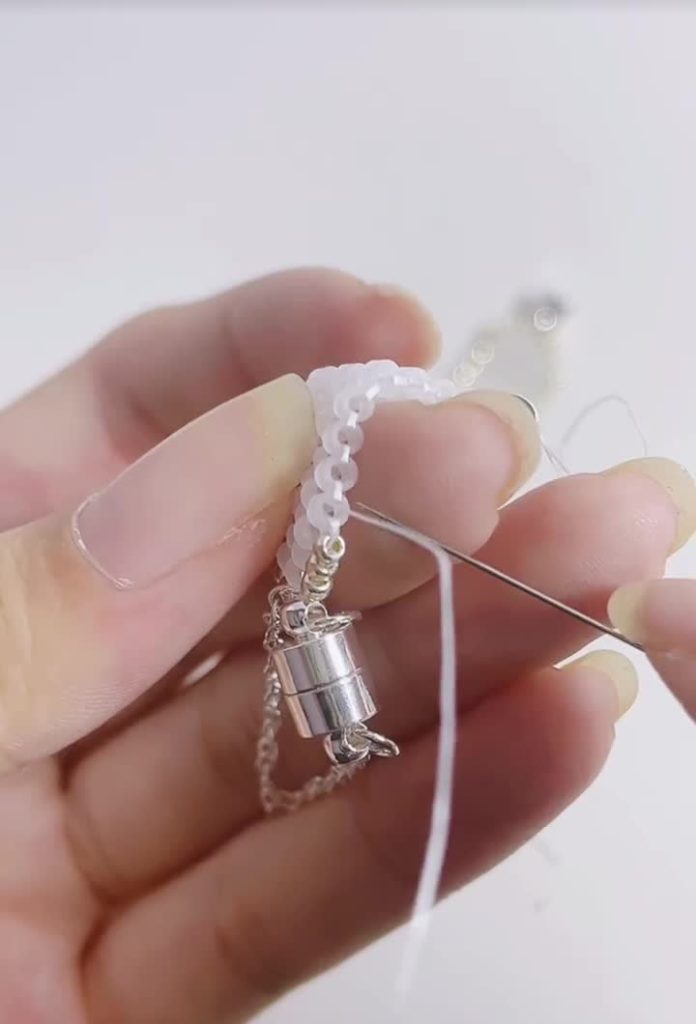
Phase 4: Attaching the Clasp & Final Touches
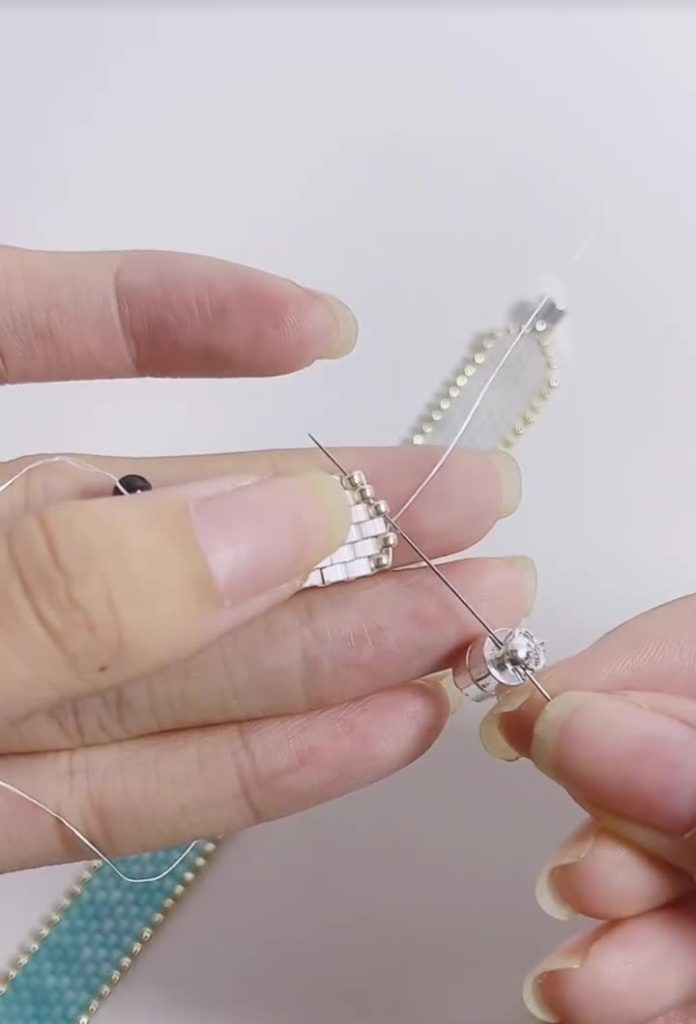
[01:16 – 01:23] Installing the Clasp
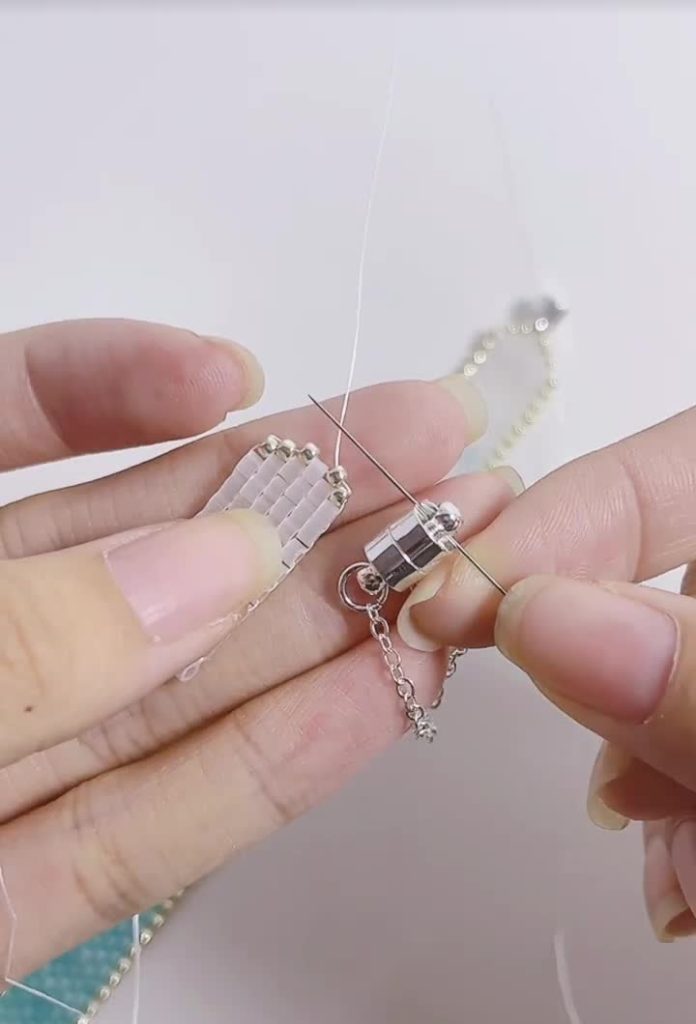
- Align your Magnetic Tube Clasp with the end of the beadwork.
- Use Silver Round Beads to act as connectors.
- Pass the needle: Beadwork -> Silver Bead -> Clasp Loop -> Silver Bead -> Beadwork.
- Reinforce this path 3-4 times for durability.
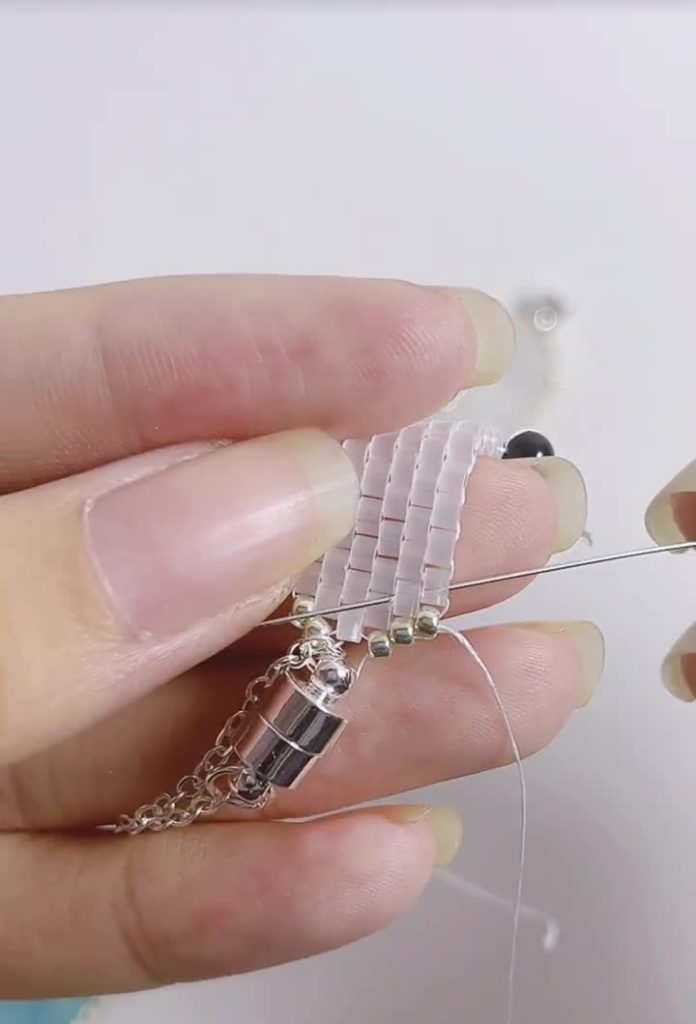
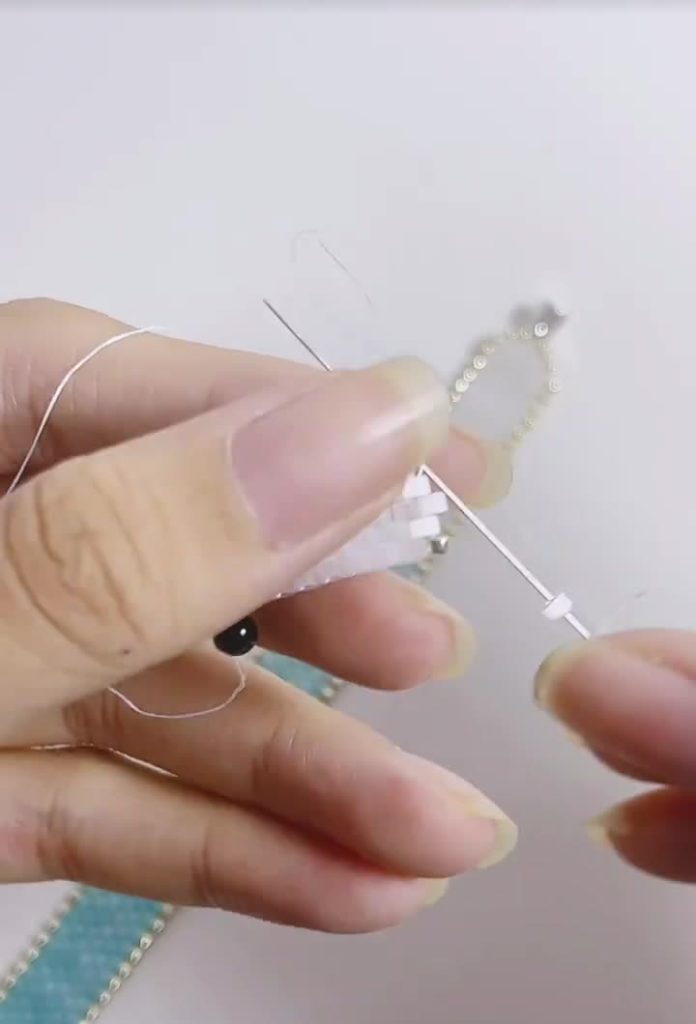
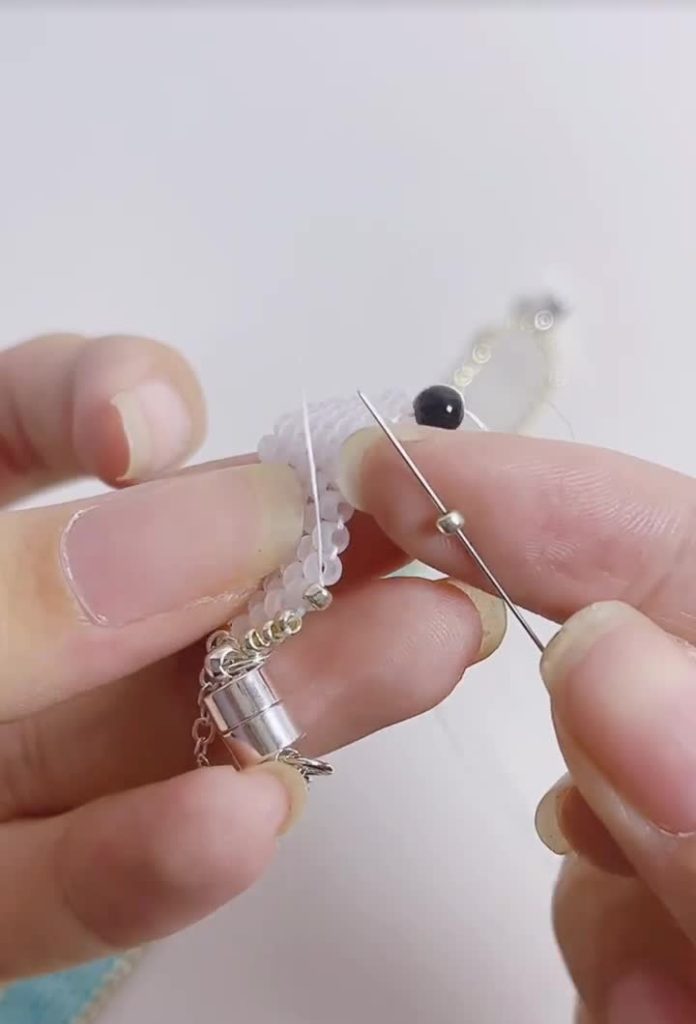
[01:24 – 01:33] The Final “Gap Fill”
- Run your thread down the outer edge of the silver beads.
- Place 1 Silver Round Bead in the gaps between the previous rows if there are any spaces exposed. This technique (passing through the bead, adding a bead, passing through the next) acts like a “zipper,” tightening the whole edge and making it perfectly straight.
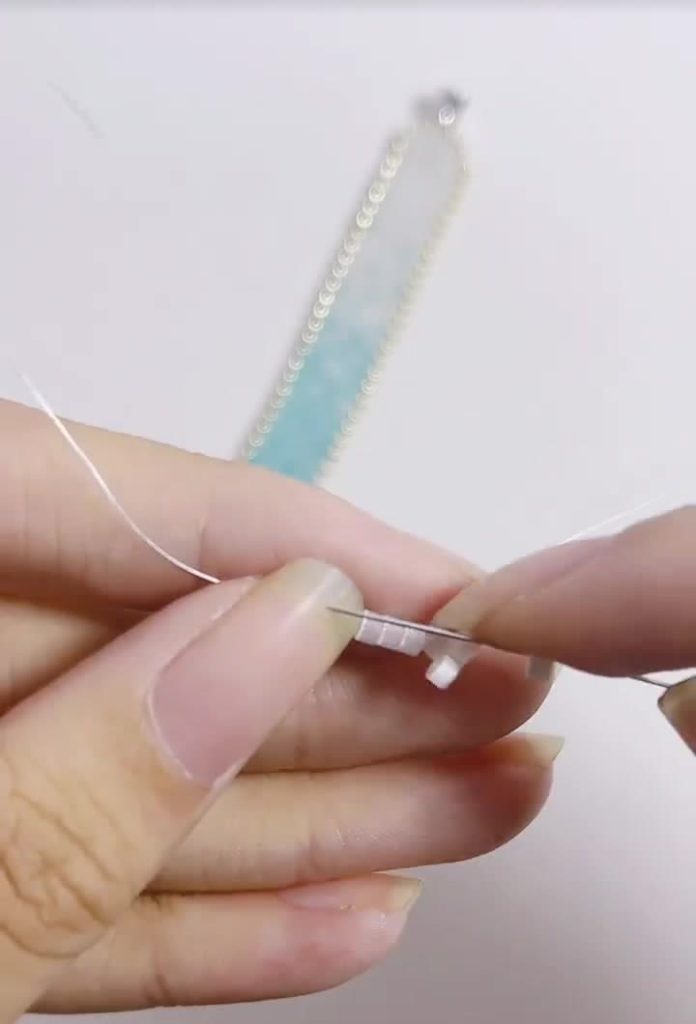
[01:35] Tie Off
- Weave your remaining thread back into the bracelet foundation in a zig-zag pattern.
- Tie a small overhand knot around a thread bridge, weave through a few more beads, and trim.
🛠️ Troubleshooting & Pro-Tips
- My strip is twisting: This usually happens if your tension is too tight during the Ladder Stitch (Phase 1). Relax your tension slightly; the beads should sit flat, not buckle.
- The gradient looks blocky: To make a smoother transition, mix your colors for a few rows between sections. For example, do one row White/Blue, then one row White, then one row Blue/Blue.
- Needle won’t go through: If using 15/0 seed beads, ensure you are using a Size 12 needle. A standard sewing needle will break delicate glass beads.
💡 Styling Variations
- The “Ombré” Effect: Instead of distinct blocks of color, change one bead color every 3 rows for a very slow, subtle fade.
- Monochrome Magic: Use matte black cylinder beads with bright gold spacer beads for a modern, edgy look.
- Width Adjustment: The tutorial makes a medium-width cuff. You can make the center strip 4 beads wide instead of 2 for a bolder statement piece.
🙋 People Also Ask (FAQ)
Q: Can I use regular seed beads instead of Cylinder/Delica beads?
A: You can, but the result will look different. Regular seed beads are donut-shaped, creating a bumpy, organic texture. Cylinder beads (like Delicas) snap together like bricks, creating the flat, smooth “antique” finish shown in the video.
Q: What is the best thread for this project?
A: Fireline (6lb) is highly recommended. It is synthetic, doesn’t stretch, and is resistant to being cut by the sharp edges of crystal or cylinder beads.
Q: How do I choose the right size clasp?
A: Measure the width of your finished beadwork (e.g., 20mm). Buy a “Slide Lock” or “Tube” clasp that is exactly that width or slightly smaller (e.g., 20mm or 18mm) so the strands stay parallel.
Q: My beads are sitting unevenly on the edge. How do I fix it?
A: This happens during the “Picot” stage. Ensure you are passing through the bead itself, not just the thread loop. Adding that final “Gap Fill” step (Step 01:24) usually straightens everything out.
Did you try this tutorial? Pin this page for later or tag us in your creations on Instagram! Happy Beading!